
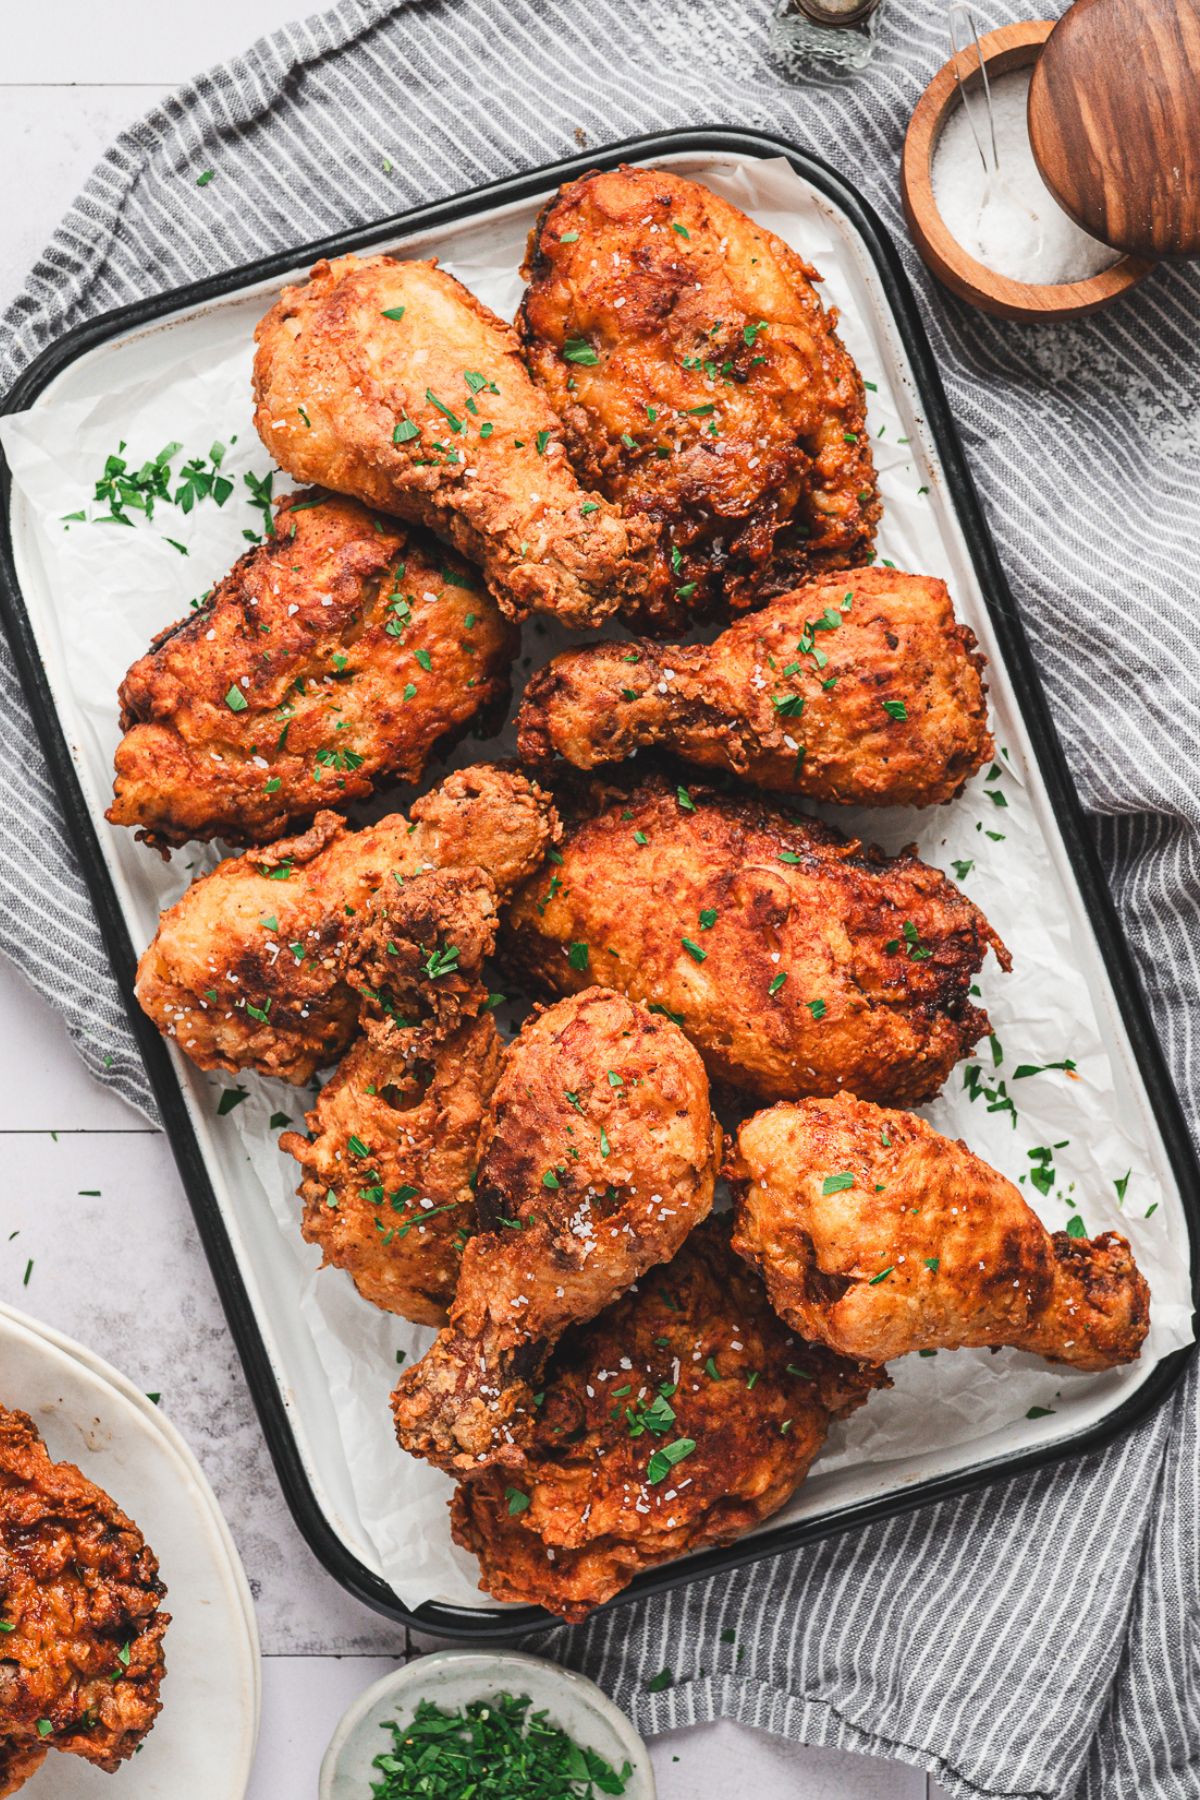
This Buttermilk Fried Chicken recipe uses a few key techniques that solve the most common fried chicken problems, so you get juicy chicken with a crisp, well-seasoned coating. It's a straightforward method that takes the guesswork out of frying, giving you consistent results without the frustration.

Note from Erin
Fried chicken used to feel so intimidating to me. I was used to oven “fried” versions, so standing over a skillet of hot oil was out of my comfort zone.
My first attempt was an epic fail. The outside burned while the inside was still raw. After a few rounds, I realized the fix was actually pretty simple. It came down to getting the size and temperature right.
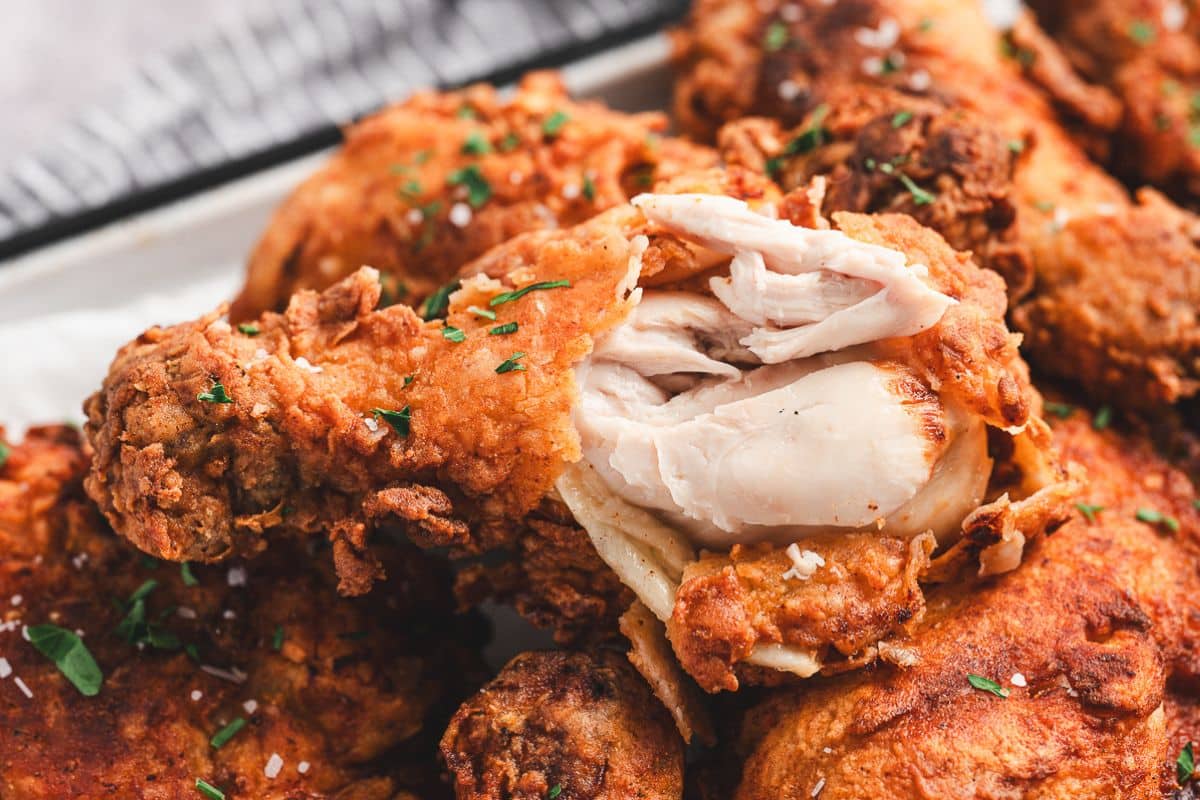
Once I dialed in those two things, I started getting a crisp, well-seasoned coating on the outside with juicy, tender chicken all the way through.
Helpful Ingredient Tips
The recipe card at the bottom of this post includes the complete list of ingredients, measurements, and instructions.
- Chicken: The biggest lesson for me was the size of the chicken pieces. The first time I made this, I used large chicken breasts, and the outside browned way too quickly before the inside was done. Once I switched to pieces about the size of my fist, everything cooked evenly.
- Buttermilk: I've tested marinades with hot sauce and added seasonings, but I love the balanced flavor of using plain buttermilk and adding the seasonings to the coating.
- Flour + Cornstarch: When I just used flour, the coating was heavy, but adding cornstarch lightened the texture and helped create a delicate crunch.
Keep It Simple 🍃
Buying pre-cut chicken (like all thighs or all breasts) is the easiest way to ensure everything cooks at the same rate.
Tips to Make the Best Crispy Fried Chicken
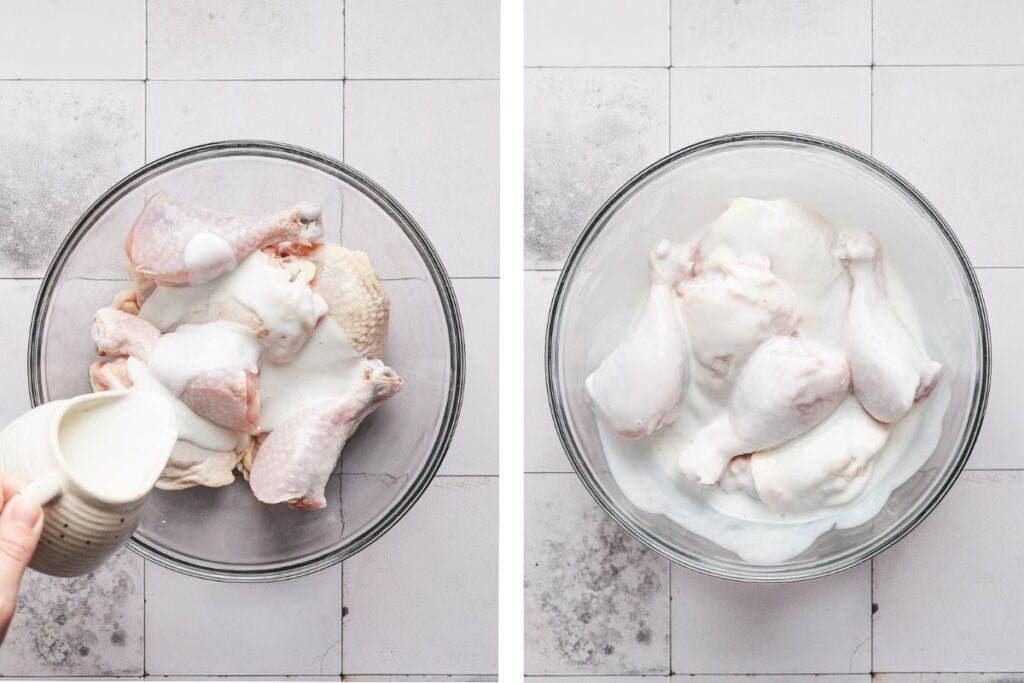
Buttermilk Marinade
- Let the chicken soak for at least 2 hours so the buttermilk can tenderize the meat.
- When you pull the chicken from the marinade, wipe off the excess buttermilk. Too much liquid creates a gummy layer that prevents the coating from sticking properly.
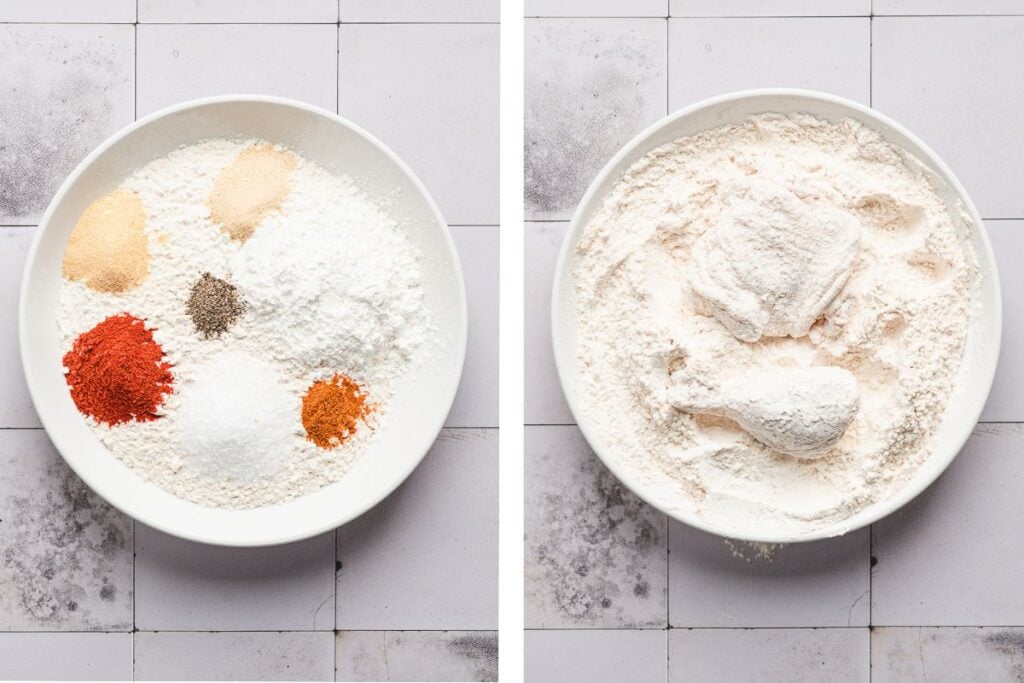
Coat in the Breading
- Once the spices are mixed with the flour and cornstarch, roll the chicken in the breading, then press the mixture into the chicken. You want a craggy, textured surface.
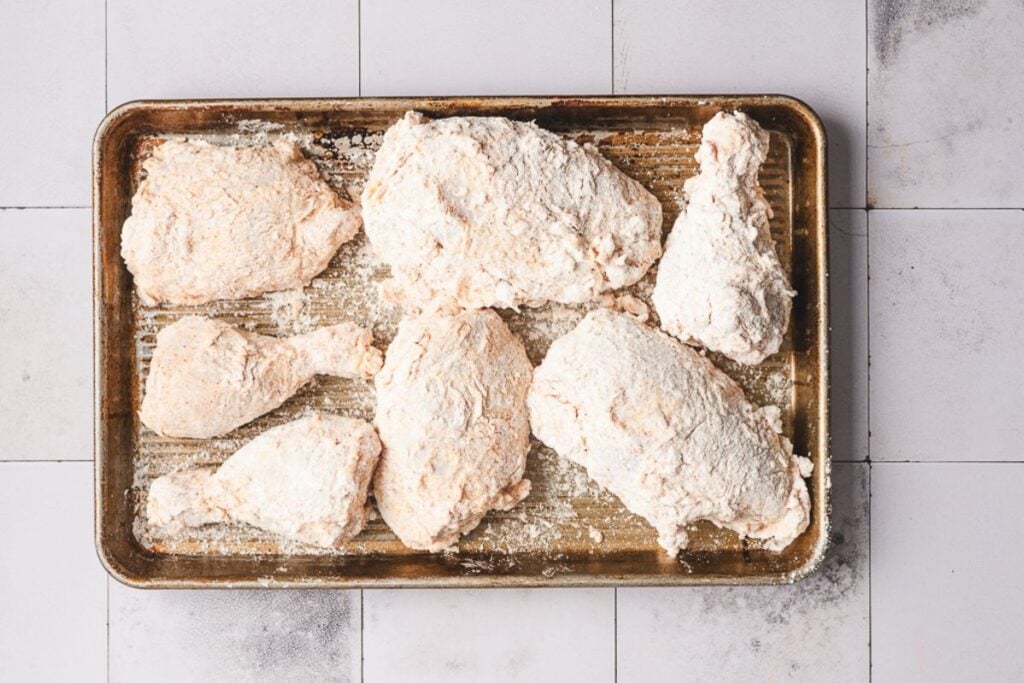
Rest the Chicken
- Let the chicken rest for at least 20-30 minutes. This allows the breading to hydrate, which helps it adhere to the chicken.
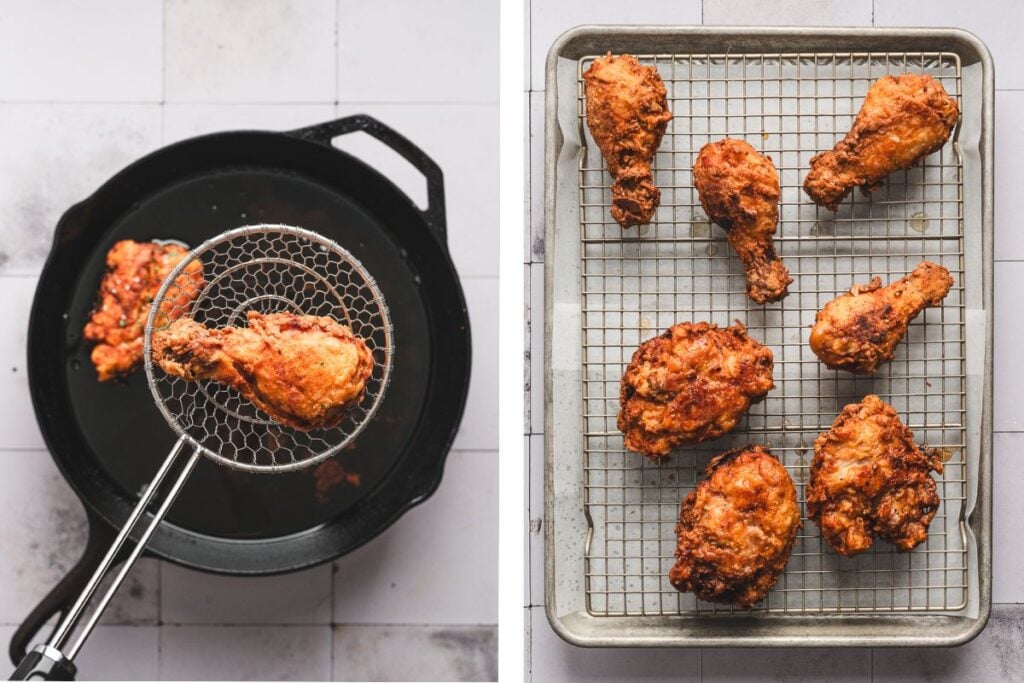
Fry in Hot Oil
- You want each piece of chicken to have space around it, as this helps keep the oil temperature within the right range. Also, crowding can cause the pieces to bump into each other, knocking off the breading.
- Remove the chicken to a cooling rack and let it rest for 10 minutes before serving.

Top Tip!
When the chicken goes in, you should see immediate, steady bubbling and hear a consistent sizzle.
If the bubbling is weak or fades after a few seconds, the oil is too cool, and the coating will absorb oil and turn greasy. If it's aggressively popping, the oil is too hot, and the inside won't cook through before the outside browns.
WANT TO SAVE THIS RECIPE?
Why Did the Coating Fall Off My Chicken?
If you've ever had the breading slide right off your fried chicken, you're not alone. I've definitely had that happen, and it's almost always because the chicken is too wet or I rushed and didn't let the coating set before frying.
What works for me is wiping off the excess buttermilk, pressing the breading firmly onto the chicken, and letting it rest until the coating looks slightly damp and patchy.
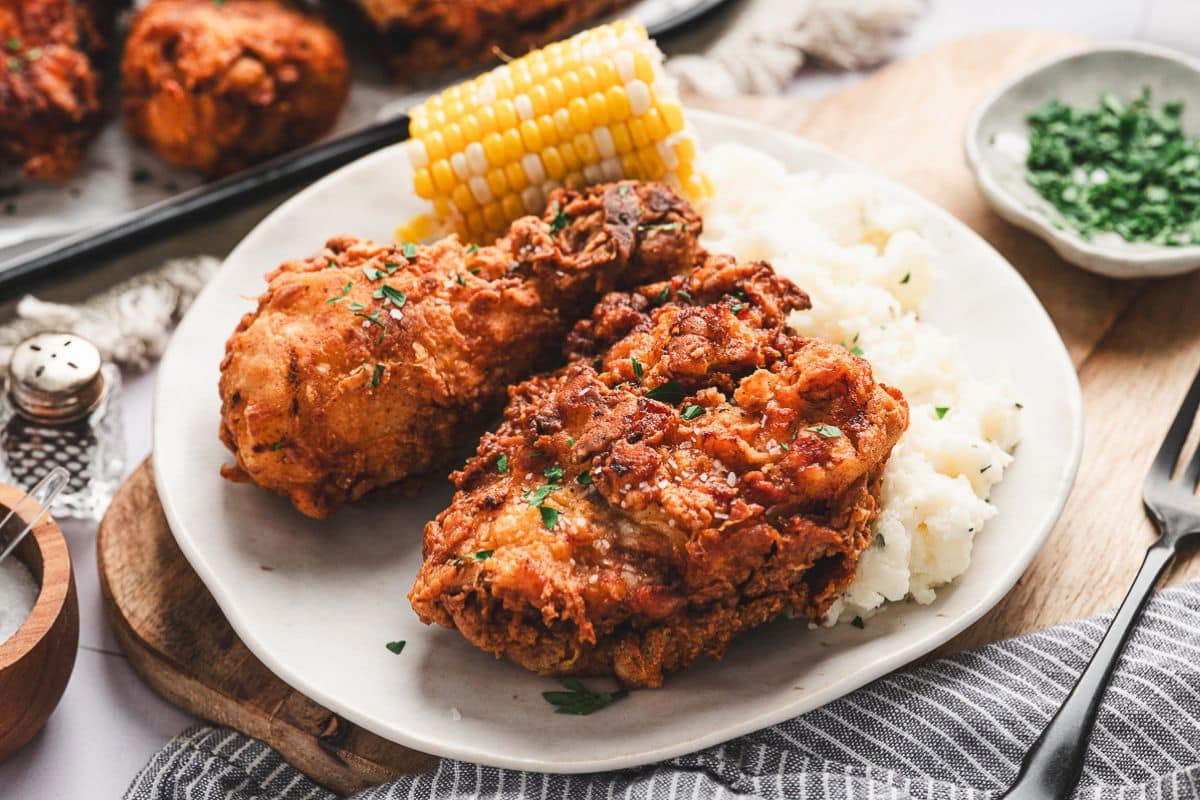
What to Serve with Buttermilk Fried Chicken
Whenever we make fried chicken, a few key sides pull the whole meal together. It ends up feeling like a classic Southern meat-and-three, with something creamy like mashed potatoes or a baked mac and cheese, plus a simple coleslaw to brighten things up and cut through the richness.
Buttermilk biscuits are pretty much non-negotiable if you want the full comfort food experience, and I like to add something tangy on the side, like pickles or a light salad, so the meal doesn't feel too heavy.
Recipe

Buttermilk Fried Chicken
Recipe by:Ingredients
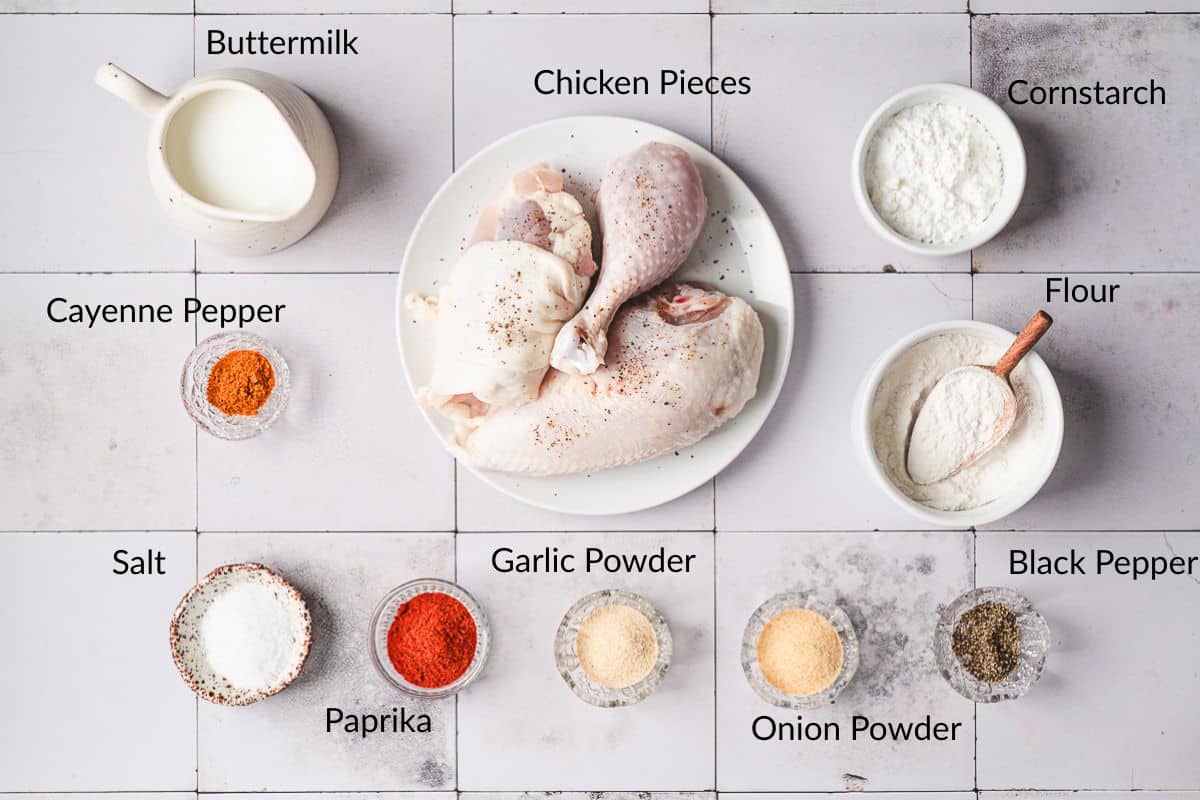
- 4 pounds (1.81 kg) bone-in, skin-on chicken pieces (such as thighs, drumsticks, or split breasts)
- 2 cups (480 grams) buttermilk
- 3 cups (375 grams) flour
- ½ cup (64 grams) cornstarch
- 2 tablespoons (36 grams) salt
- 1 tablespoon (7 grams) paprika
- 2 teaspoons (4 grams) onion powder
- 1 tablespoon (8 grams) garlic powder
- 1 teaspoon (2 grams) pepper
- 1 teaspoon (2 grams) cayenne pepper (adjust to taste preference)
- 4-5 cups vegetable oil
Instructions
- Place chicken pieces in a large bowl. Pour the buttermilk over the chicken and stir to coat each piece. Cover and refrigerate for 2-4 hours.4 pounds bone-in, skin-on chicken pieces , 2 cups buttermilk
- Mix the flour, cornstarch, and all seasonings together in a pie plate or other shallow dish.3 cups flour, ½ cup cornstarch, 2 tablespoons salt, 1 tablespoon paprika, 2 teaspoons onion powder, 1 tablespoon garlic powder, 1 teaspoon pepper, 1 teaspoon cayenne pepper
- One piece at a time, remove the chicken from the marinade and wipe off the excess buttermilk. Then place the chicken piece in the flour dish and turn it to coat all sides, and press the flour mixture firmly into the chicken.
- If you prefer an extra-crispy crust, dip the chicken back into buttermilk and then into the flour. Place on a plate and set aside for 30 minutes.
- Pour 1-2 inches of oil into a large heavy-bottomed or cast-iron skillet (no more than ½ way up the side of the pan). Heat the oil to 350℉ (177℃).
- Carefully place chicken into the hot oil, with space between each piece.
- After 6–8 minutes, check the bottom of one piece of chicken. It should be a deep golden brown before you turn it to cook the other side.
- Once the internal temperature reaches 160°F (71°C), remove the fried chicken from the oil, as it will continue to rise to a safe temperature while resting. The total cook time is usually 15–20 minutes, depending on the size of the pieces.
- Carefully remove the chicken and place it on a wire rack with parchment paper or a baking sheet under the rack. Let it rest for 10 minutes, then serve.
Notes
Nutrition
The nutritional facts provided are only estimates. The accuracy of the nutritional information for any recipe on this site is not guaranteed.
Comforting Dinner Recipes

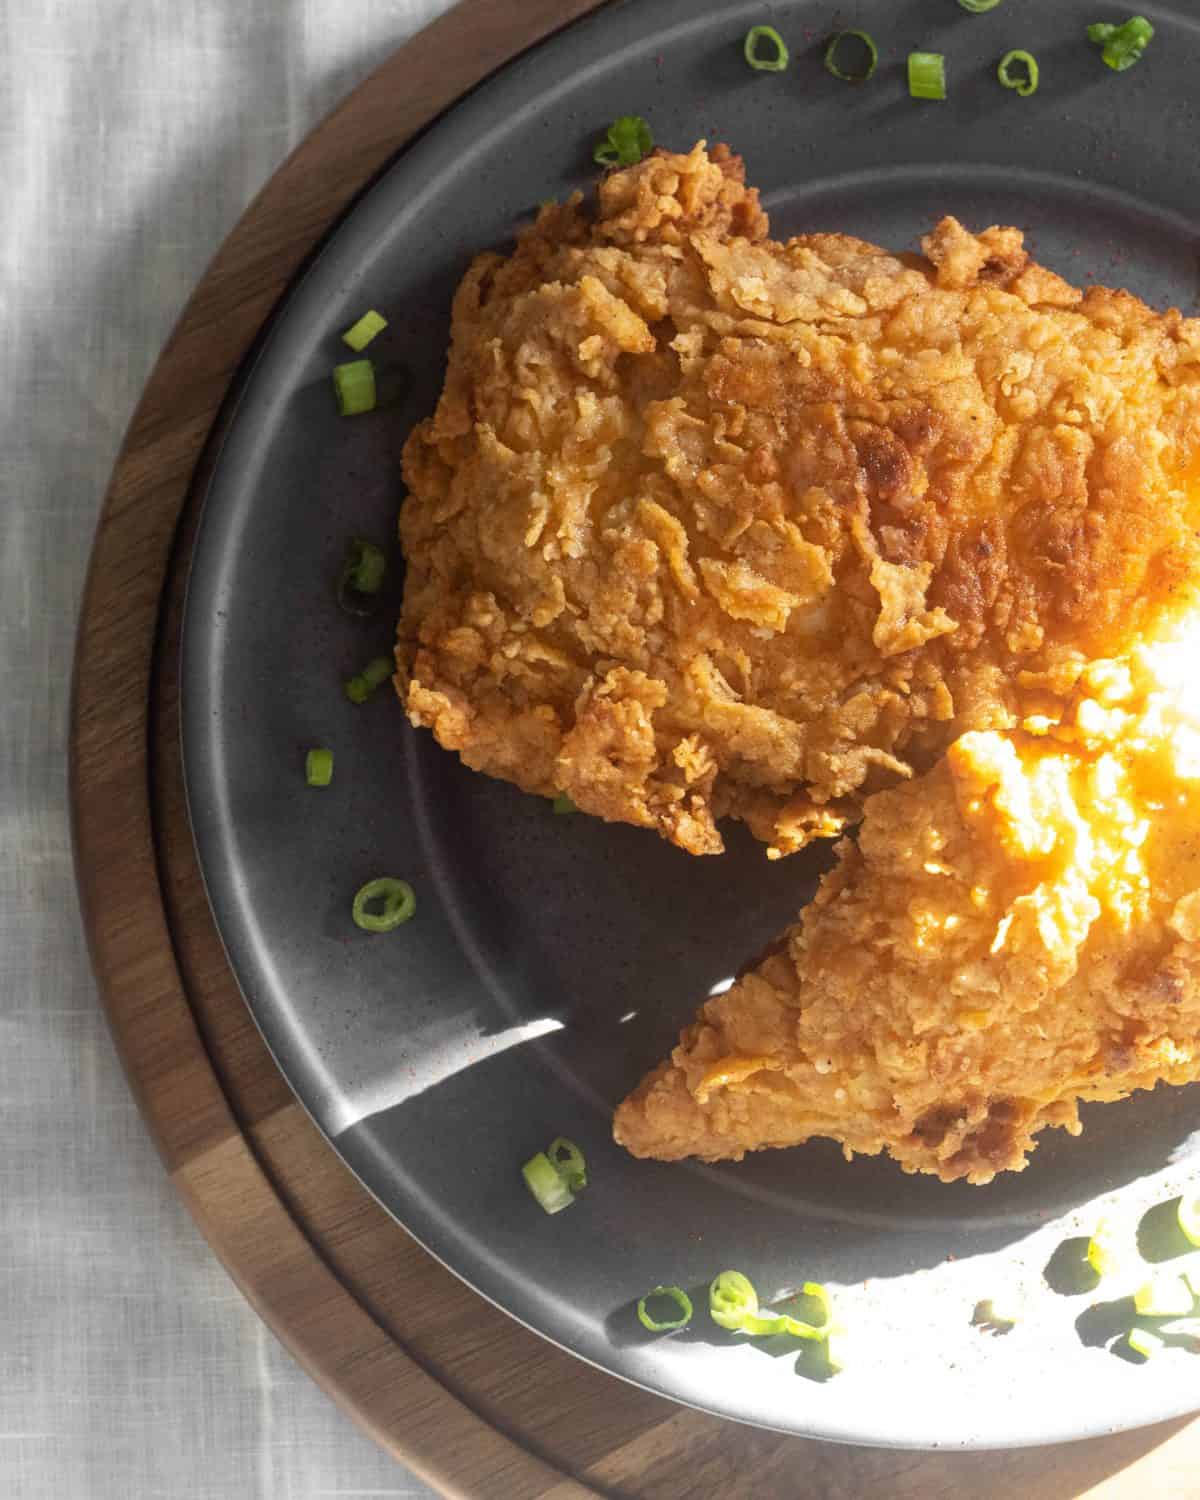
This post was originally published on July 19, 2020 as one of the first on this website! It was updated on April 8, 2026, to include more helpful tips and new pictures. Here's one of my favorites from the original photos.
Tony Montano says
Thank you for this wonderful recipe.My family loved it so much they want me to make it again.
Erin Gierhart says
Don't you love it when you make a recipe that the family loves? Feels so good. Thanks for sharing that this was a hit for you!
Alun says
I just made this uaing gluten free flour. It makes such a difference using the cornstarch and baking powder. The chicken turned out delish!!
Erin Gierhart says
That's fantastic! So glad you enjoyed it!