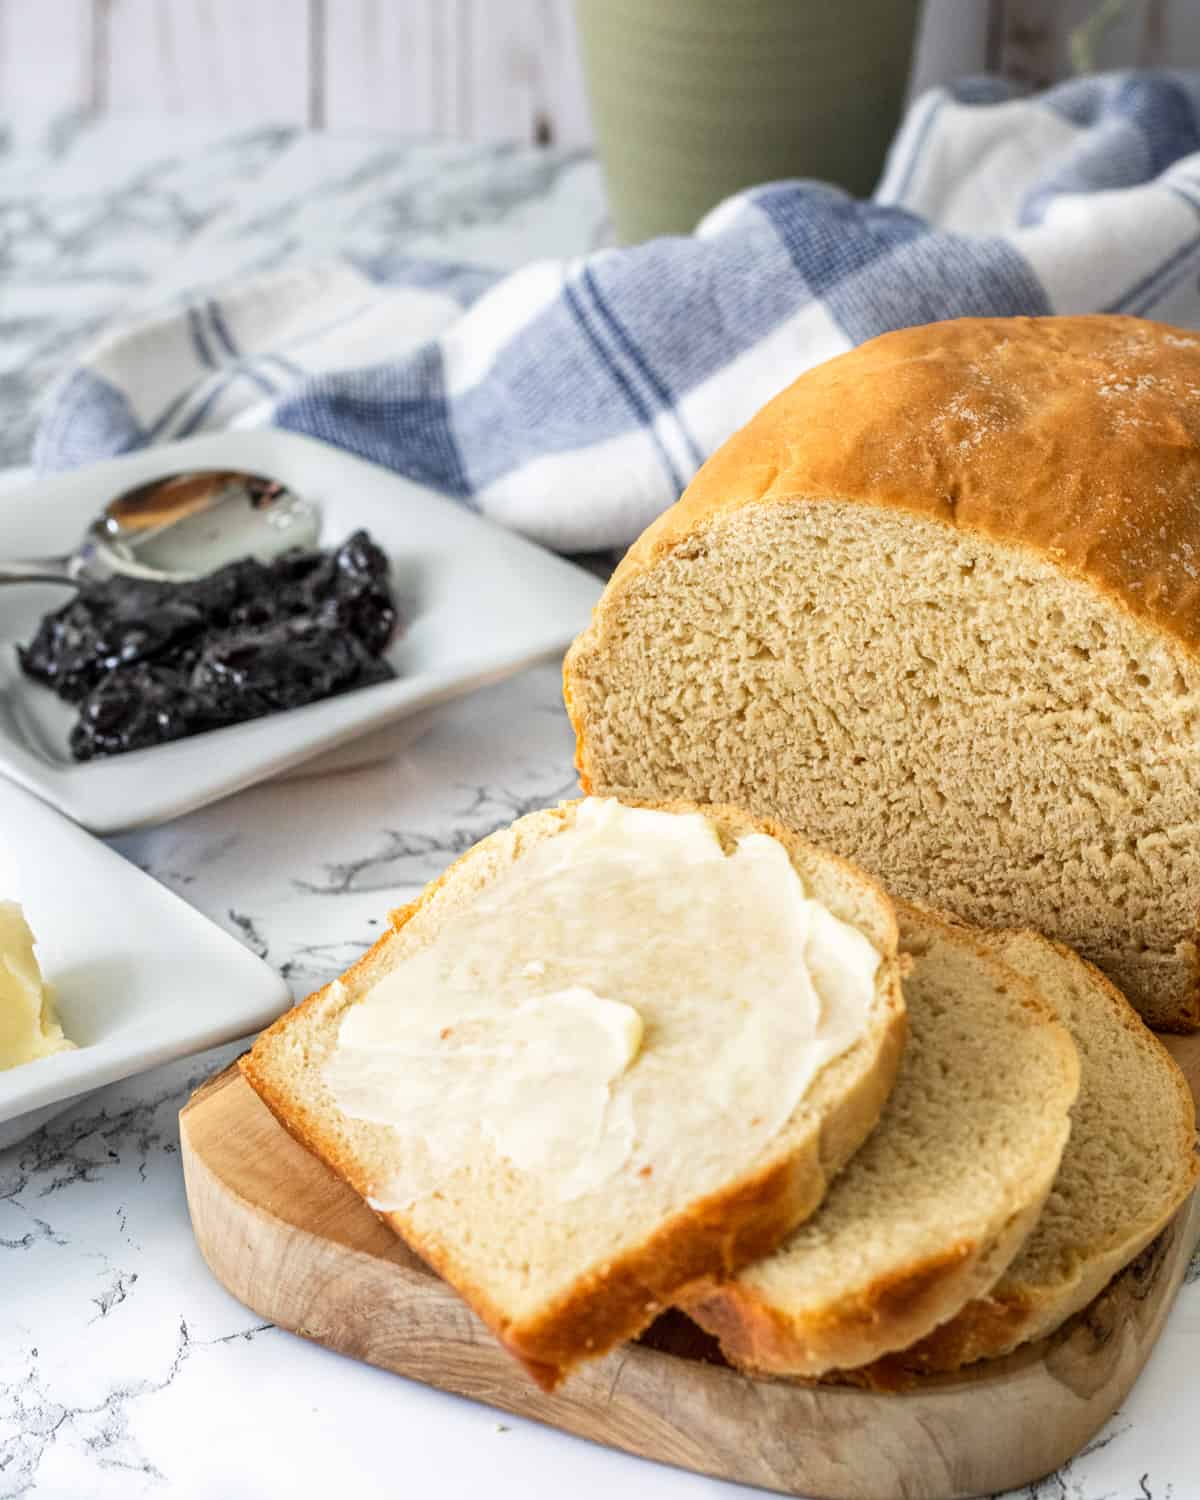
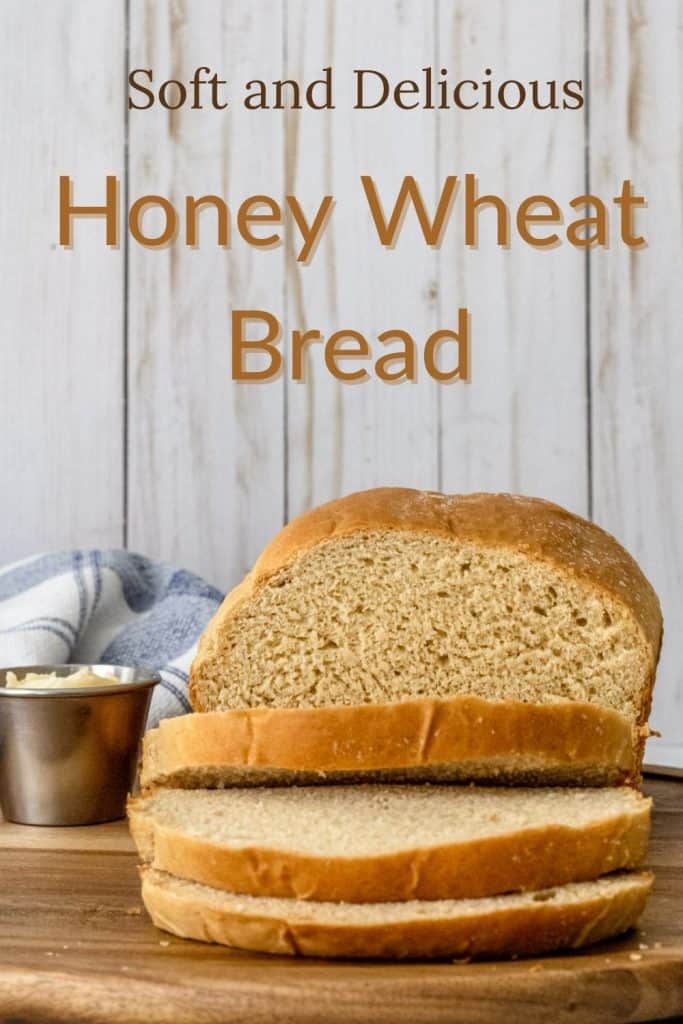
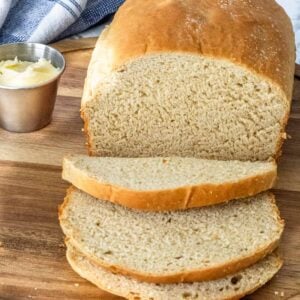
Freshly-baked homemade bread is the best! This recipe will give you two loves of soft and fluffy, perfectly sweetened bread.
Jump to:
Honey wheat bread is one of the first recipes that I learned to make. My mom had an electric wheat mill and she would buy giant bags of whole wheat. I have very vivid memories of pouring the wheat into the mill cup by cup, scooping out the freshly ground wheat flour.
As a teenager, I sold honey wheat bread to family friends and at craft fairs. Back then I kneaded it once using a stand mixer, and a second time by hand. I have since learned some time-saving tricks, along with a better understanding of ingredients. The result is a softer bread that is a lot faster to make!
The Science Behind the Ingredients
The ingredients that you chose for your bread recipe can drastically impact the final results. Let me break down for you why I have selected certain ingredients, and how they will impact your bread.
- White Whole Wheat- When you purchase regular whole wheat flour you get flour made from red grain wheat, which is dense and hearty. White whole wheat is made from a white wheat varietal, which is lighter in color and flavor. Now here's where it gets a little confusing: White whole wheat flour is NOT the same as white flour! Whole wheat flour uses the whole grain of wheat, whereas all-purpose (white) flour is bleached.
- Bread Flour- This flour is made using hard spring wheat, which produces more gluten in your dough. This gives you the stretch and texture that you want in a good loaf of bread. You can buy whole wheat bread flour on Amazon. I just use regular white bread flour because it is more widely available
- Active Yeast- This is the most common yeast found in regular grocery stores. It does have to be proofed, but don't let that frighten you! I will walk you through the process.
- Milk- Milk strengthens the gluten, and it creates a softer bread than if you were to only use water.
- Honey- We use honey to add sweetness to the bread. It also lengthens the shelf life and contributes to a moist loaf of bread.
- Butter- This is another ingredient that increases the shelf life of your bread. Butter also helps the bread to rise. It is added towards the end of the kneading because fat can coat the flour and keep the gluten from forming.
- Kosher Salt- While important for flavor, salt also helps to regulate the yeast.
Proofing
The most intimidating part about baking with yeast is wondering whether or not your yeast is good. No one wants to waste their time or ingredients on bread that never rises. The solution? Proof your yeast!
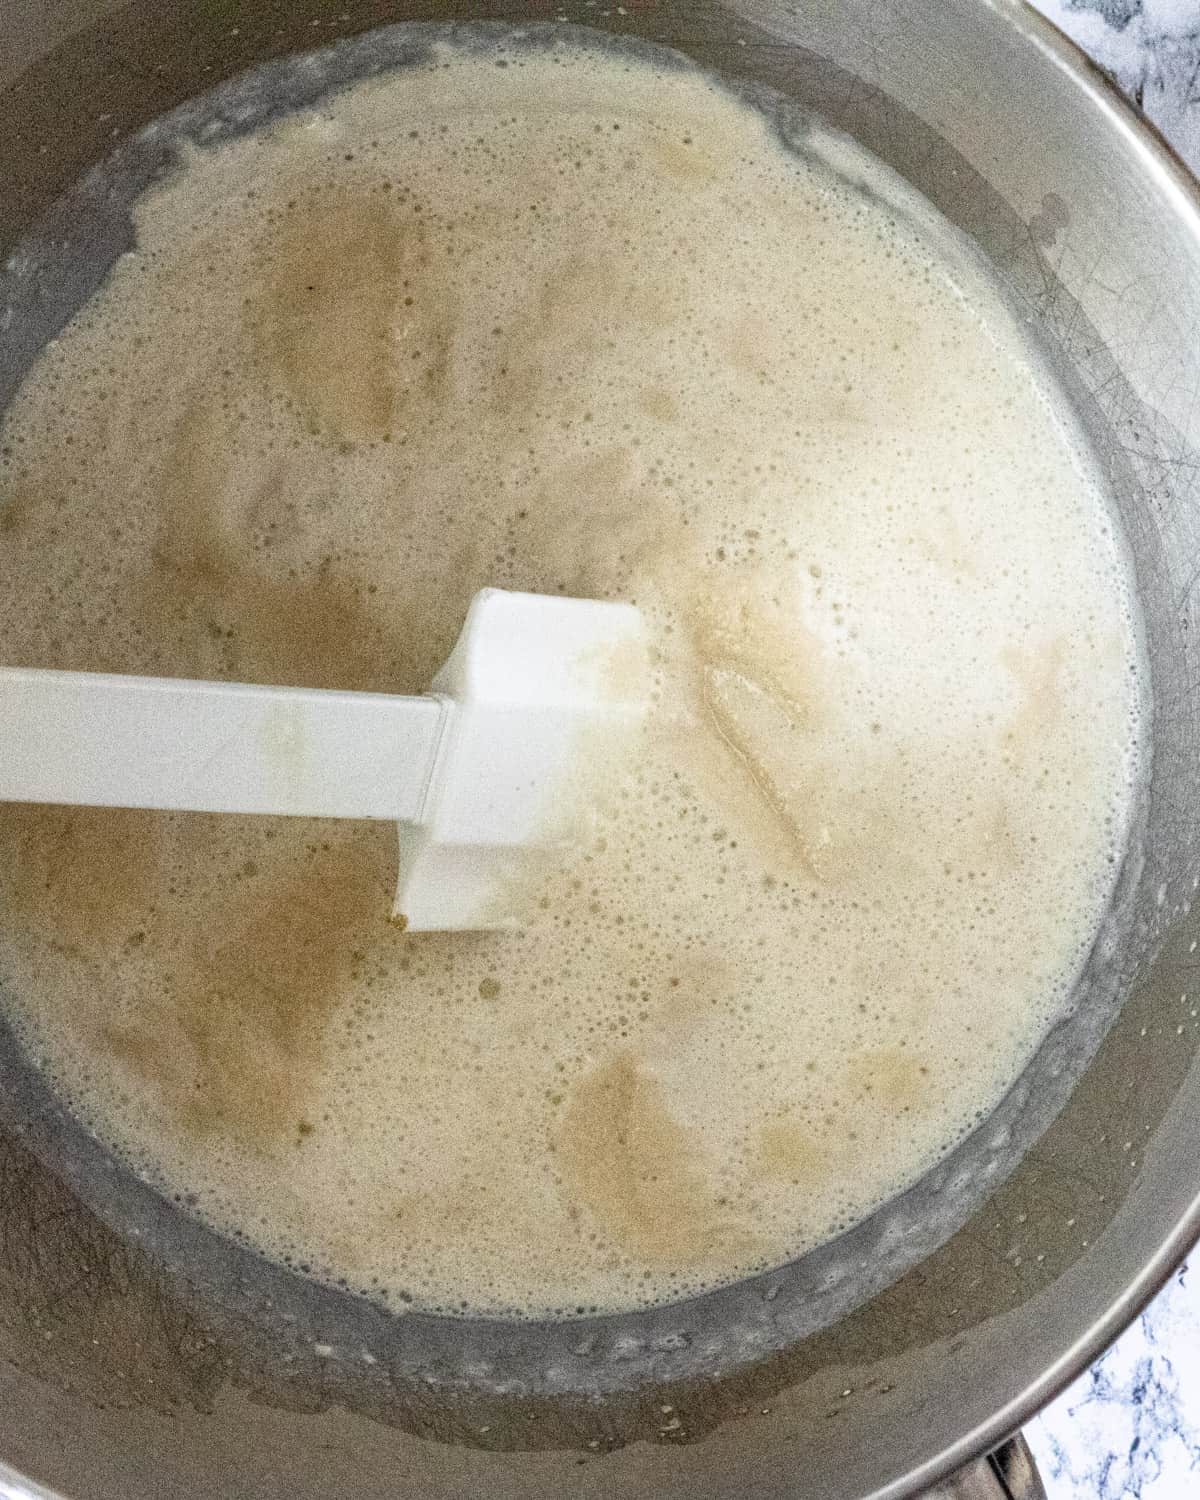
Proofing yeast is essentially testing your yeast with a liquid and sweetener. In our honey wheat bread recipe, we do this with warm milk and water, both between 100-110 degrees. If our liquid is too warm it will kill the yeast, so it is important to use a thermometer.
Honey is our sweetener, and it feeds the yeast, helping it expand. Some honey has antiseptic properties in it and kills the yeast instead of feeding it. I have never had this problem, but if your yeast does not bubble, try different honey. You should also check the expiration date on your yeast, as expired yeast will not activate. Hopefully, neither of those is a factor and your liquid begins to bubble at this step.
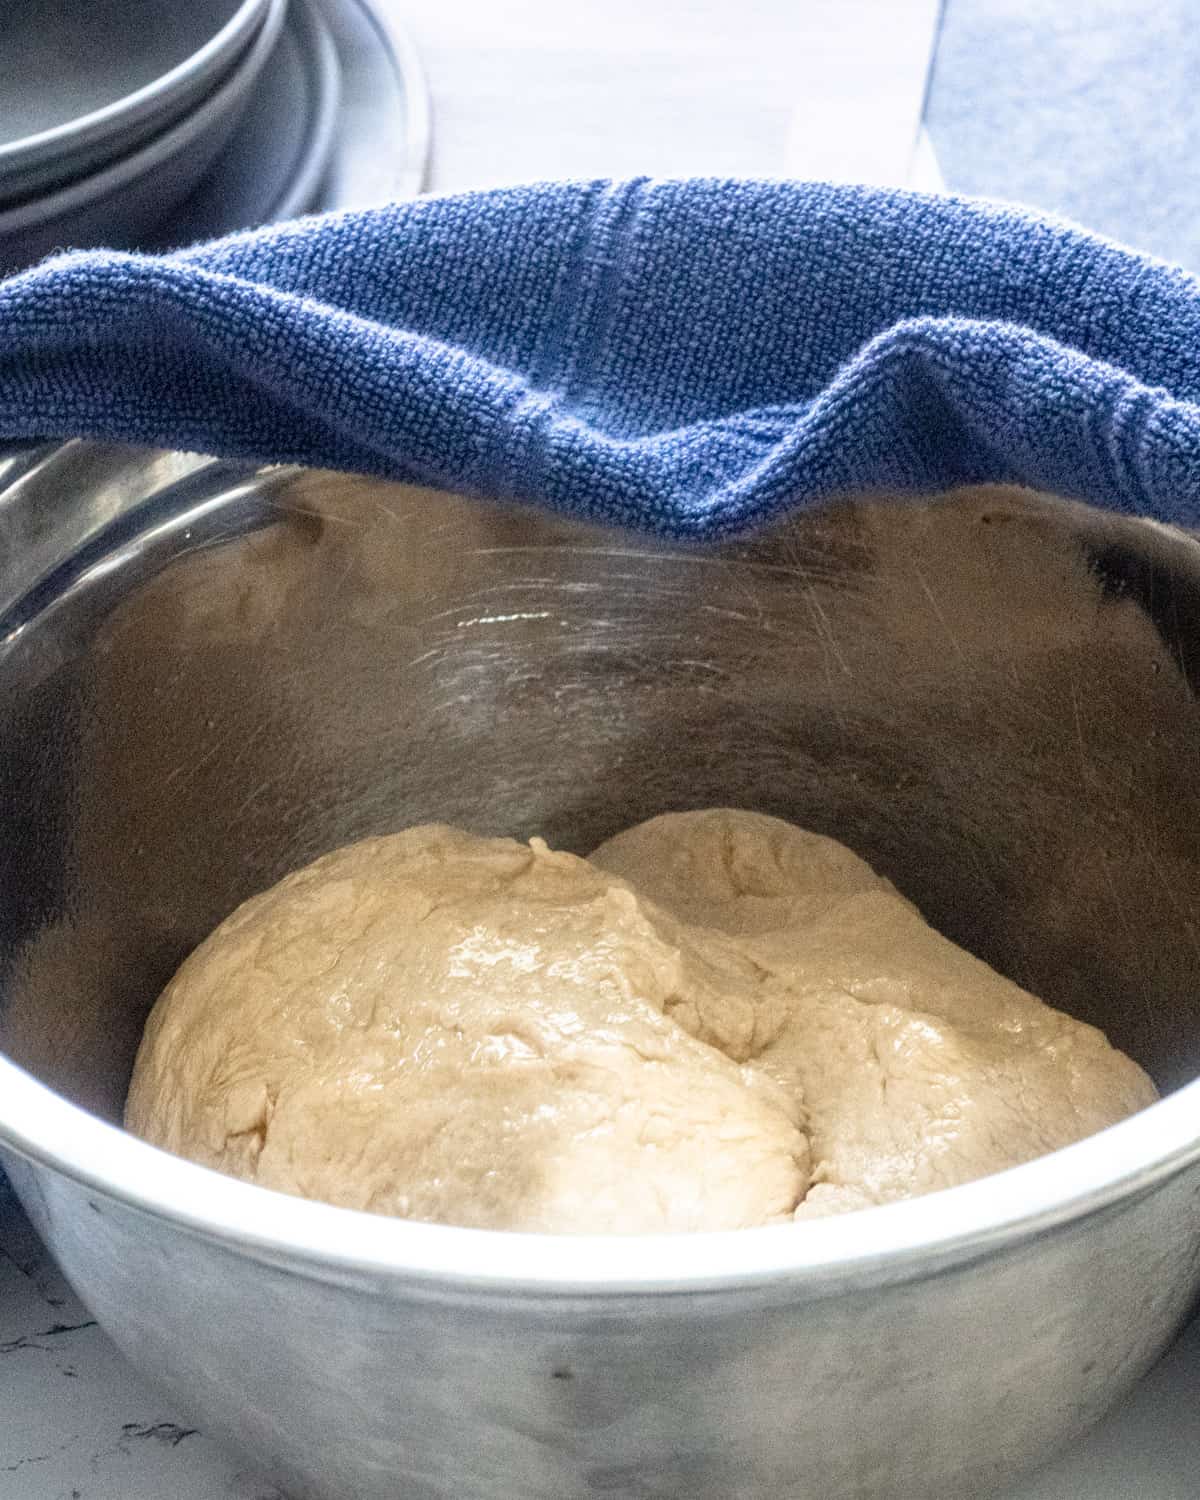
There is another element of proofing, and that has to do with our flour. Once the yeast is tested, add in your whole wheat flour and let it rest for 20 minutes. This step helps break down the enzymes in the flour and balances the gluten and starch. At the end of this rest time, your mixture should look bubbly like the photo below.
Kneading the Dough
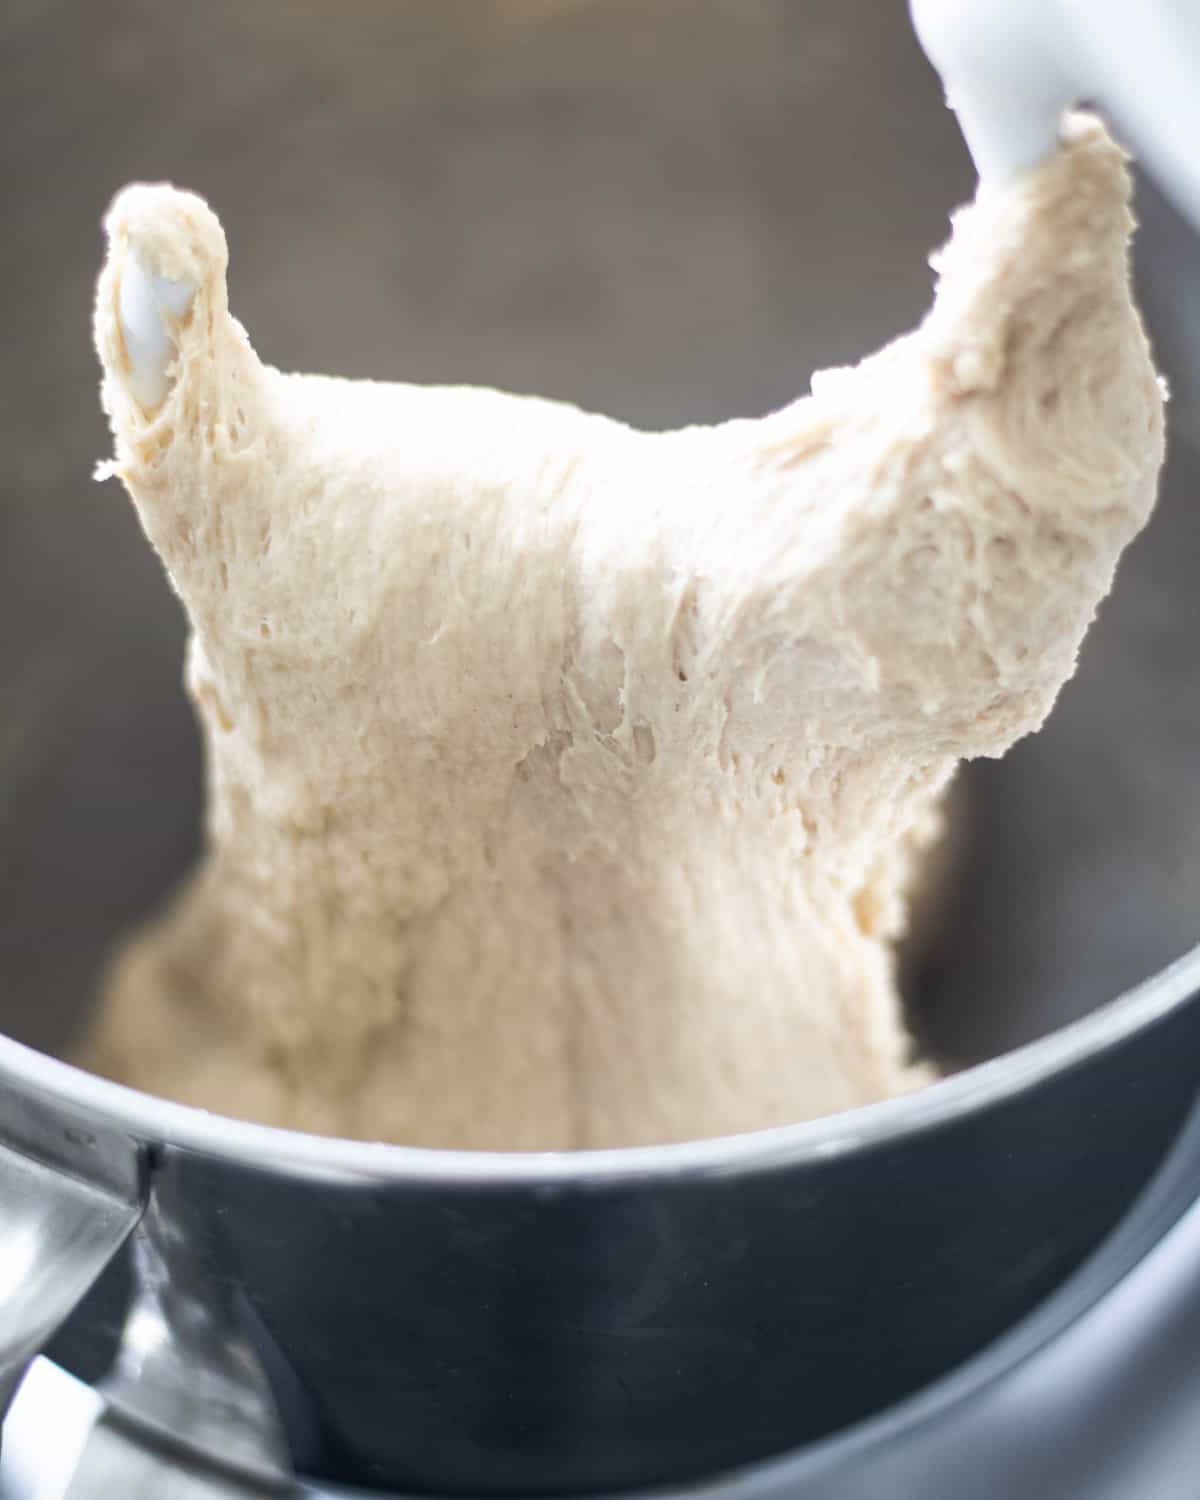
Making bread is very little work, but a whole lot of waiting! Once the 20-minute resting period is over, add in your remaining ingredients. Then you are ready to knead your dough! The act of kneading breaks down the proteins into strands of gluten, which gives the bread its texture.
I like to use my hand mixer to knead the dough. It is efficient and easy! Using a dough hook, turn your mixer on low speed for 10 minutes. As the flour mixes in, it will look bumpy all over. As the kneading continues, the dough will become smooth and stretchy. That is when you know it is ready to rise!
WANT TO SAVE THIS RECIPE?
Rising
All of the work is done! Now it is time to rest. When I am feeling lazy then I do this step in the same bowl that I used to mix. A little dough will stick on the sides, but that doesn't bother me. However, you can also pour a little oil in a clean bowl and transfer the dough into it. Turn the dough to coat with oil on all sides. This will keep it from sticking.
Next, cover the bowl with a towel and put it in a warm spot. If your home is cold or drafty, you can heat your oven to 175 degrees and then turn it off. Place the towel-covered bowl inside and close the door. Just don't forget it is in there and turn your oven on! Now we wait.
Baking Honey Wheat Bread
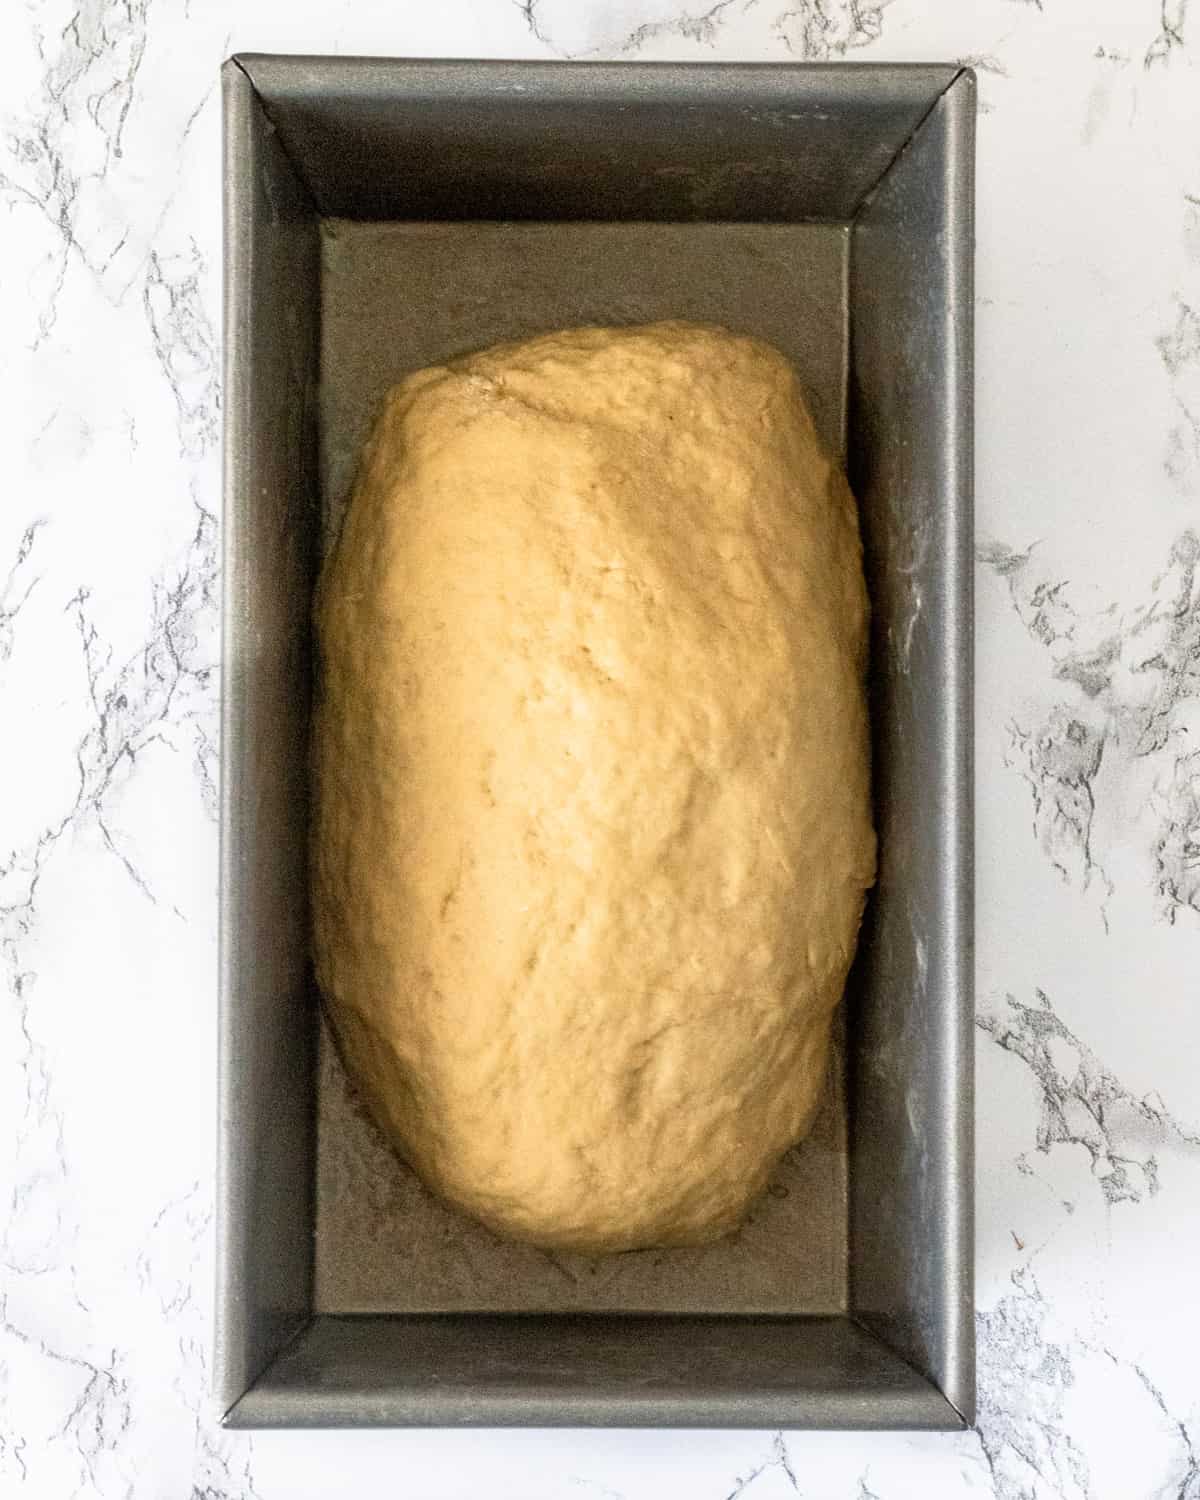
Once your dough has doubled in size, punch it down. You can do this as gentle or as forceful as you want, depending on your level as stress at the moment. It gives me great satisfaction to see the dough shrink down.
Divide your dough in half, and shape each dough into a loaf. Then take each loaf individually, and throw it hard onto your counter. This is why they say baking is therapeutic! It is fun to throw the dough, but it is also useful. Just one good smack is all you need to push out any air bubbles trapped inside.
Place them in greased loaf pans and set aside for their final rest. After about 20 minutes the dough should be doubled in size. They are ready to bake!
FAQs about Honey Wheat Bread
Ideally, you will have a nicely rounded, smooth top of your bread once it is baked. But if it is sagging and wrinkly it is because you let it rise for too long. I find that somewhere in the 18-20 minute range is perfect in my home. But based on your house temperature, it may be different for you. Keep an eye on it and place it in your preheated oven once it has doubled in size.
You can knead your dough by hand. Here is a quick little video that shows you how to knead your dough.
If you have a bread machine, you can also knead your dough according to the instructions of your machine. Turn the machine to the dough setting. Once it is finished kneading, proceed with step 4 of our recipe.
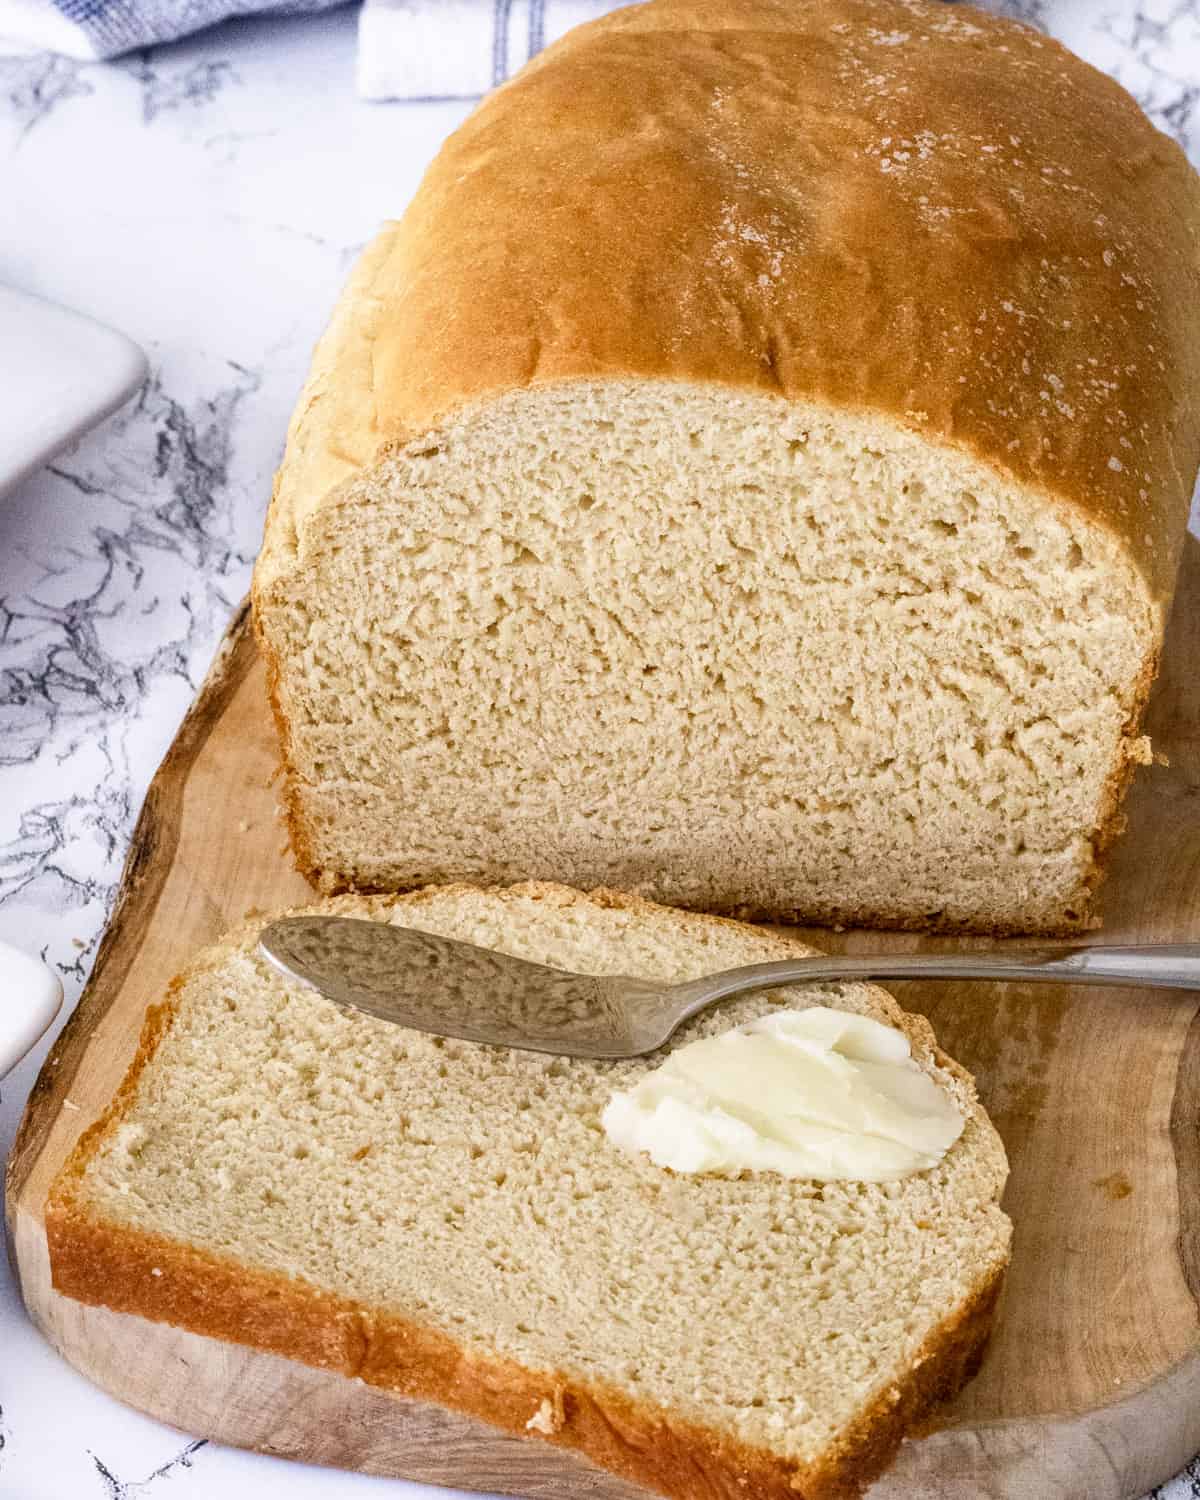
You don't want to overbake it. because it will be dry. But underbaking would leave you with gooey dough instead of delicious bread. As the bread bakes it will turn golden brown. Tap on the top and if it is fully cooked then it will sound hollow.
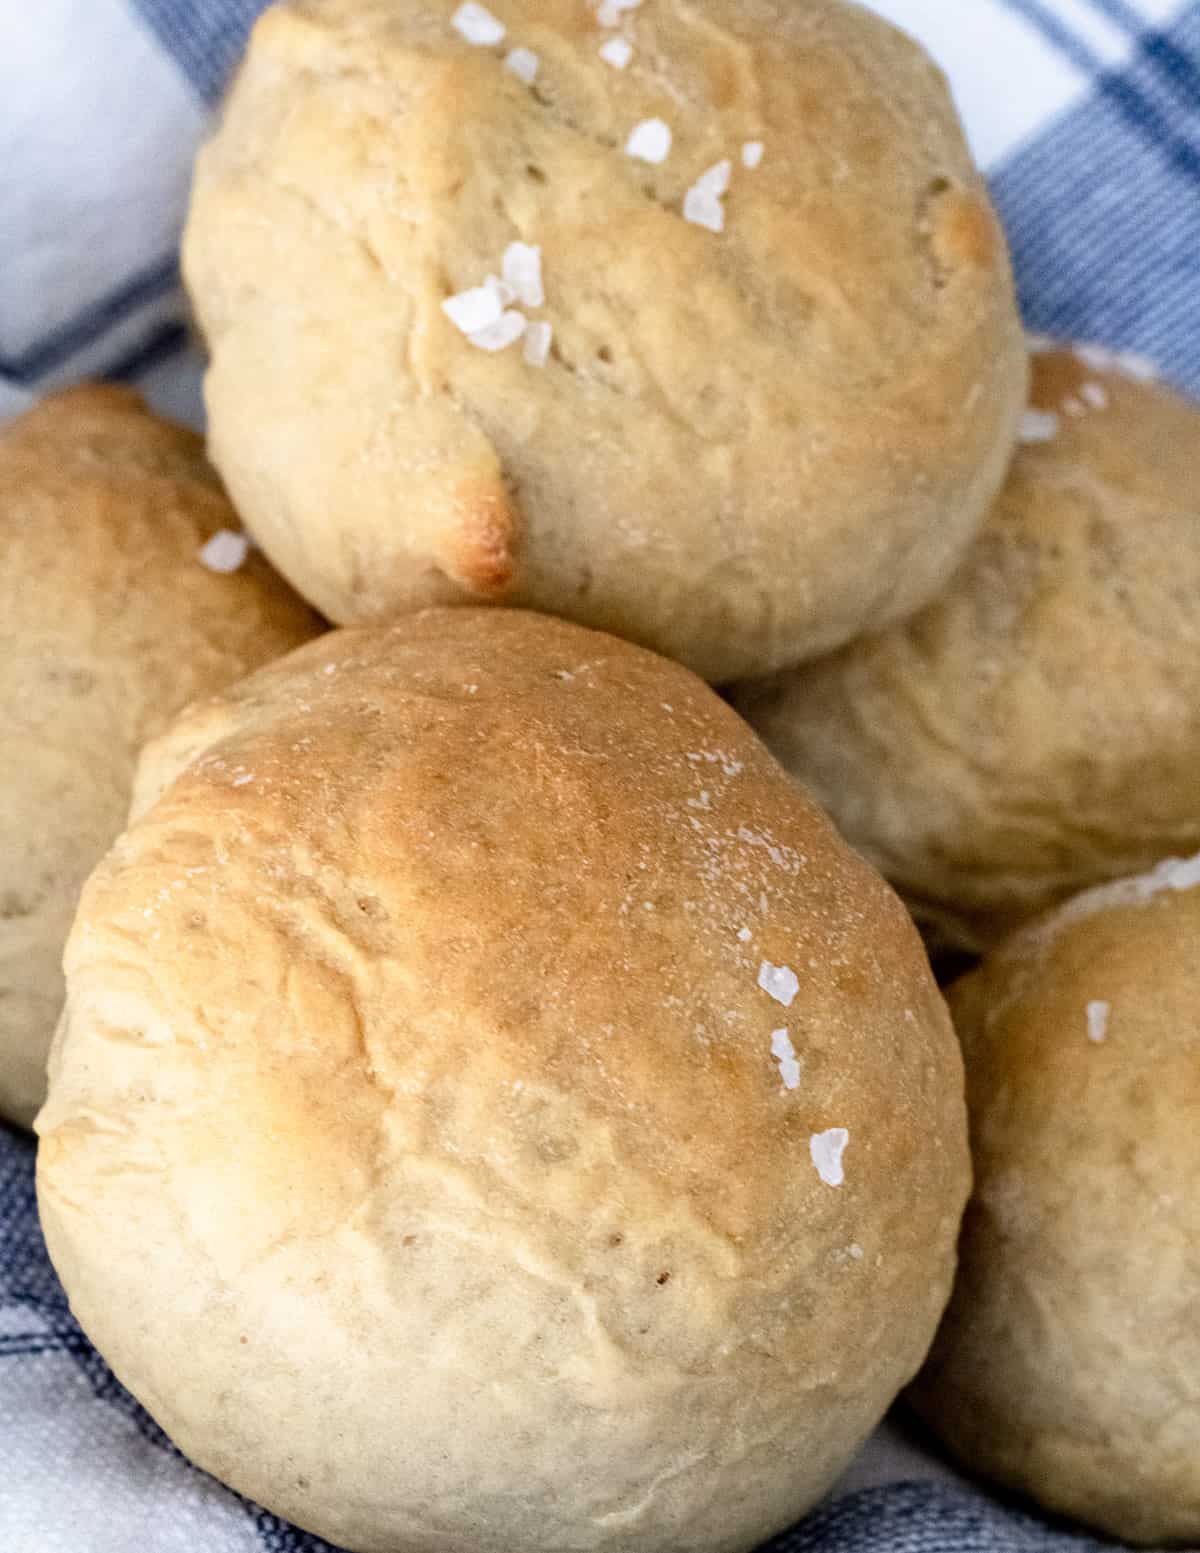
I love honey wheat dinner rolls! This recipe will make 24 rolls. But what I love to do is bake one half of the dough as a loaf and the other half as rolls.
Pinch off 24 pieces of dough, as equal in size as you can get it (it ends up being about a quarter cup of dough or so). If you are making one loaf of bread with the dough and the other half rolls then you will divide into 12 pieces. Then place them on a baking sheet distanced about the same as you would space cookies. Bake them at 350 for 15 minutes, then brush some melted butter on top. I love to sprinkle them with a little sea salt as well, just for some extra love. Put them back into the oven for an additional 5-10 minutes, or until they are golden brown.
This bread is delicious with pot roast! We enjoyed it as a part of our Kansas state dinner.
Recipe
Honey Wheat Bread
Recipe by:Ingredients
- 2 cups warm milk (100-110 degrees)
- ¼ cup warm water (100-110 degrees)
- ¼ cup honey
- 2 pkg dry active yeast (or 4 ½ teaspoons)
- 3 cup white whole wheat flour (360 grams)
- 2 teaspoon kosher salt
- 3 tablespoon melted butter
- 2 ½ cups bread flour (300 grams)
Instructions
- In a large mixing bowl, combine warm milk, water, honey, and yeast together and let sit for 5 minutes.2 cups warm milk (100-110 degrees), ¼ cup warm water (100-110 degrees), ¼ cup honey, 2 pkg dry active yeast (or 4 ½ teaspoons)
- Add whole wheat flour and stir until all of the dry flour has been mixed in. Let sit an additional 20 minutes. The yeast mixture should have a layer of bubbles.3 cup white whole wheat flour (360 grams)
- Add salt, butter, and bread flour to the yeast mixture. Using dough hook, knead on low speed for 10 minutes, or until dough no longer sticks to the side. The texture of the dough should be smooth and elastic.If you do not have a stand mixer, you can knead by hand until it loses its stickiness and doesn't tear when you stretch it. A bread machine may also be used, using the "dough" setting.2 teaspoon kosher salt, 3 tablespoon melted butter, 2 ½ cups bread flour (300 grams)
- Cover with a towel and place in a warm spot that is free from drafts, for one hour.
- Grease two loaf pans.
- Punch the dough and divide it in half. Shape to form two loaves. One at a time, throw the loaf hard onto the counter, to remove any air bubbles, then place the dough in loaf pan. Let dough rise in pan for 20 minutes.
- Preheat oven to 350 degrees.
- Bake both loaves of bread for 30 minutes. Brush tops with melted butter and bake an additional 5-10 minutes. When bread is done it will be golden brown and it will sound hollow when you thump it.
Notes
Nutrition
The nutritional facts provided are only estimates. The accuracy of the nutritional information for any recipe on this site is not guaranteed.
Shobelyn Dayrit says
Looks very easy and I love that you took time to explain the step but step instruction.
Erin says
Thank you! I hope that you enjoy this delicious bread!
Kasy says
Looks delish! It is the season for warm breads and soups, can't wait to try it!
Erin says
Yes! Warm bread and soup make the whole house feel cozy!
Shaheen says
Oh my!! This is such an amazing and detailed post on bread that I don't need to read and search about it anywhere. Very informative 👍
I love to read about the science behind it. Thanks for sharing.
Erin says
I am so glad that you found it helpful! Thank you for sharing!