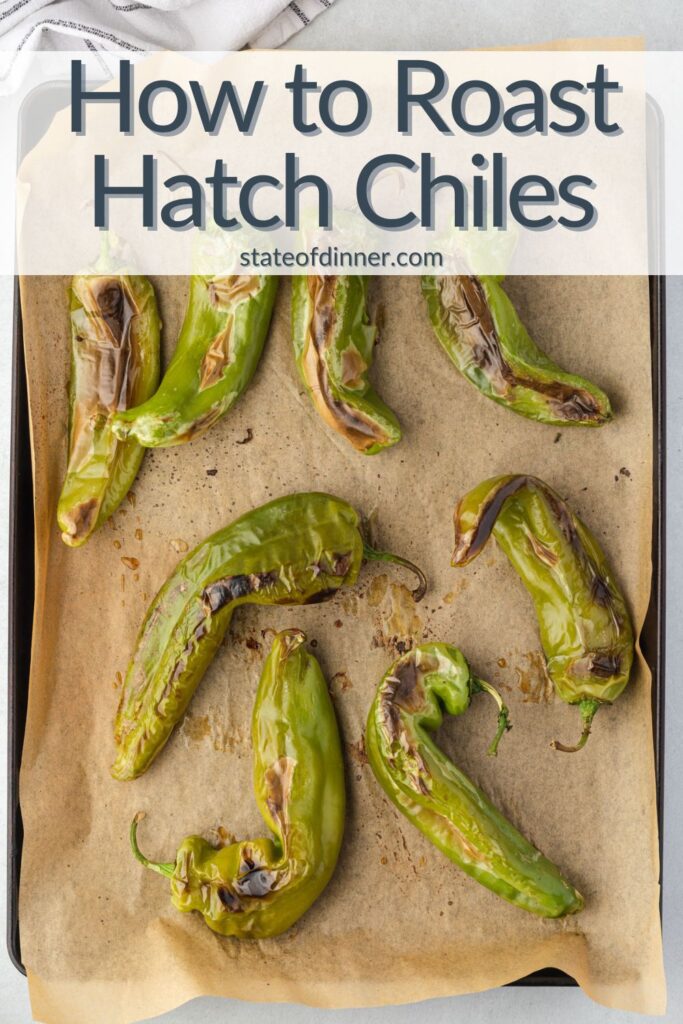
It's easy to roast Hatch chiles on the grill or right in your oven! Take advantage of Hatch season by roasting your own chiles. Use them right away to add delicious smoky flavor to your favorite recipes, or freeze them to use year-round!
What Do Hatch Chiles Taste Like?
Hatch chile peppers are green peppers grown in the Hatch Valley region of New Mexico. People love these chiles for their unique flavor. They are earthy with a hint of sweetness.
The heat level ranges from mild to spicy. Though most hatch chiles are between 1,500-2,500 on the Scoville scale, some can be as hot as 8,000. For comparison, a jalapeno pepper is between 2,500 to 8,000 Scoville heat units. Typically the smaller the pepper the spicier it will be.
Hatch, New Mexico is known as the Chile Capital of the World! Check out our New Mexico state dinner to read more about the hatch pepper and New Mexican cuisine!
When is Hatch Chile Season?
The Hatch crops are planted in the spring, and usually harvest starting in early August. They have a short season and the crops are usually fully harvested by the end of September. Weather plays a part in when the peppers are ready, but you can usually find Hatch peppers in your local grocery store by mid-August.
How to Choose the Best Chiles for Roasting
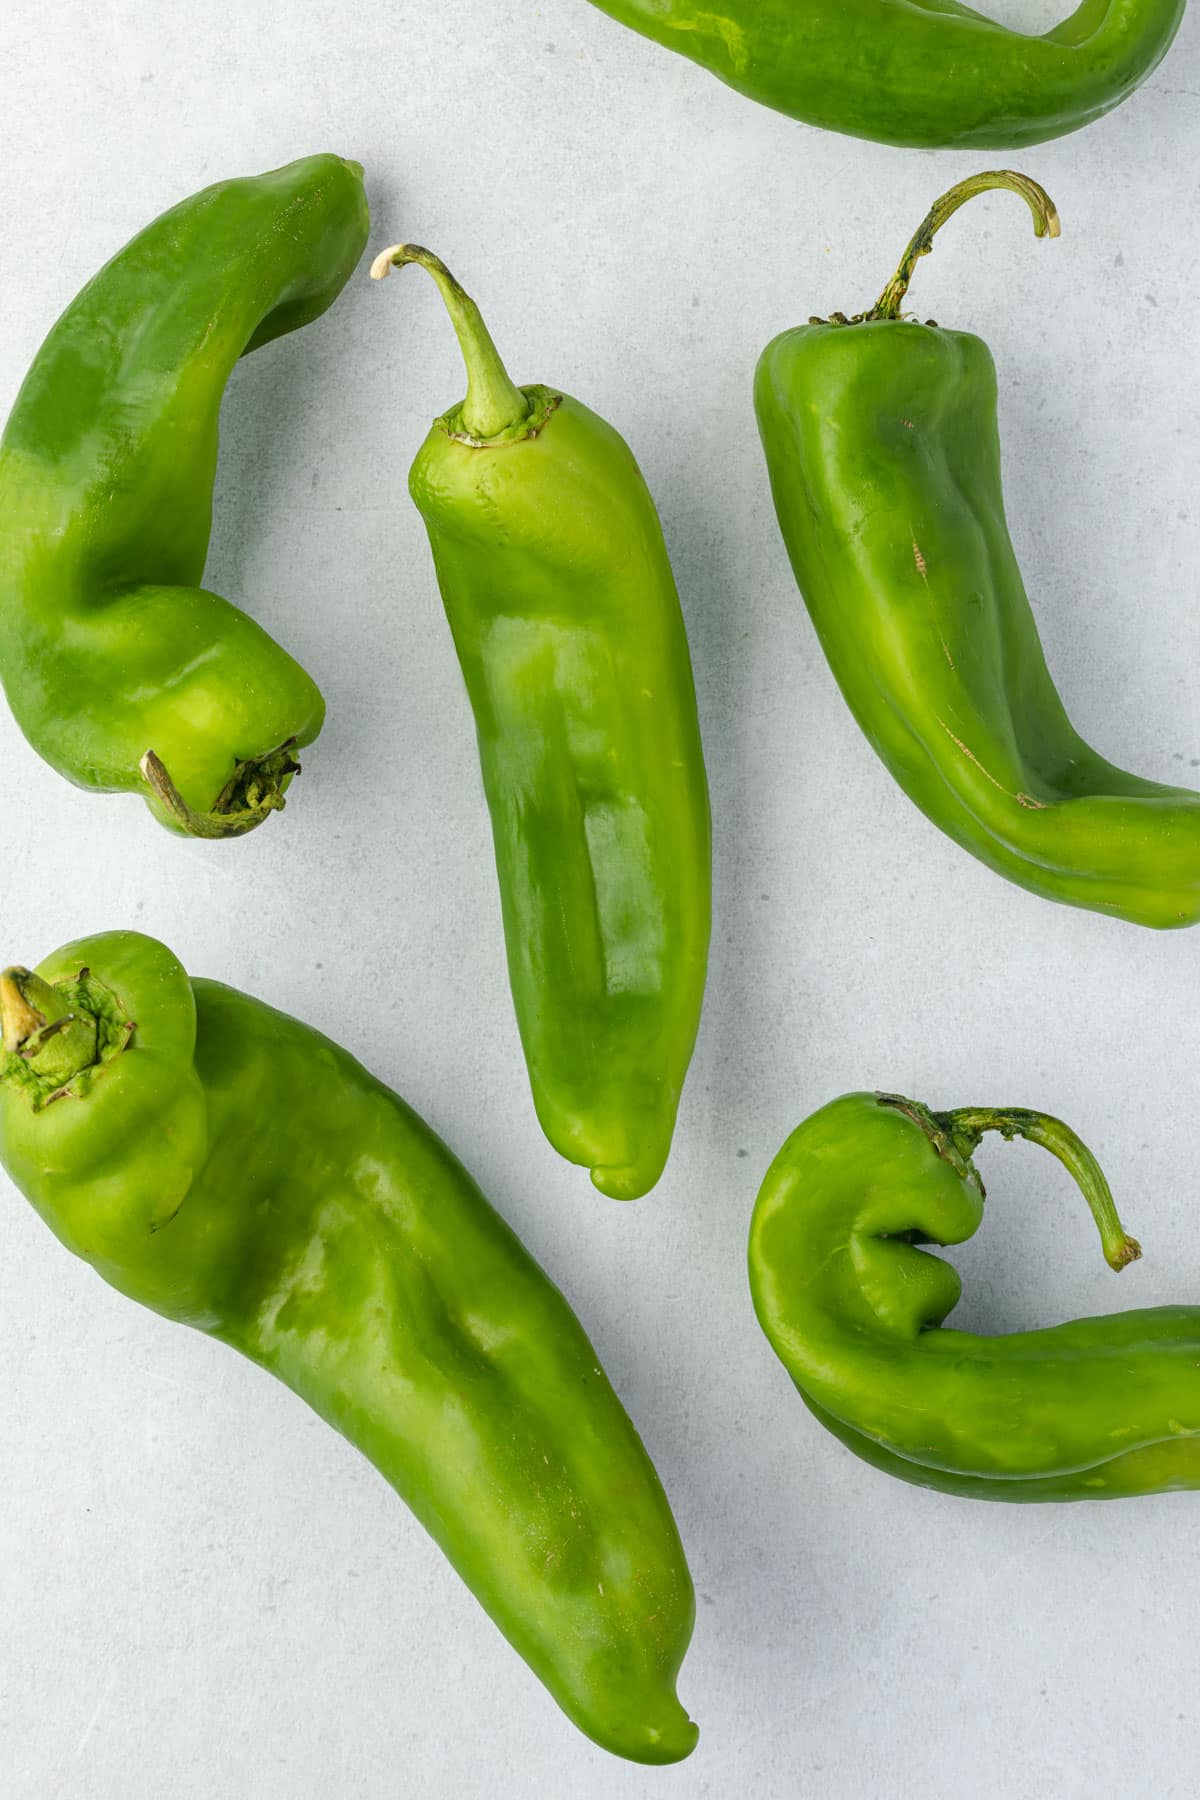
- Hatch chiles that curl look great for photos, but they are difficult to roast evenly. Instead, select straight peppers that are symmetrical and can lay flat on the sheet pan.
- They should be smooth and crisp.
- The most flavorful peppers will be heavy for their size.
- Look for bright green color! The peppers will turn red as they ripen. Red Hatch peppers are delicious, but they are sweeter and less smoky than green chiles.
How to Roast Hatch Chiles
Roasting is key to bringing out the iconic flavor of Hatch chiles as it enhances their sweetness and imparts a delicious smoky taste.
There are a few easy methods for roasting chiles at home. In my opinion, roasting them in the oven is the simplest approach. However, many people love the extra smoky depth roasting over an open grill lends to the peppers.
No matter which roasting method you opt for, be sure to start with fresh chiles that are fully rinsed and patted dry before placing them in contact with high heat. Within minutes you’ll unlock the signature Hatch chile flavor that makes them so crave-worthy!
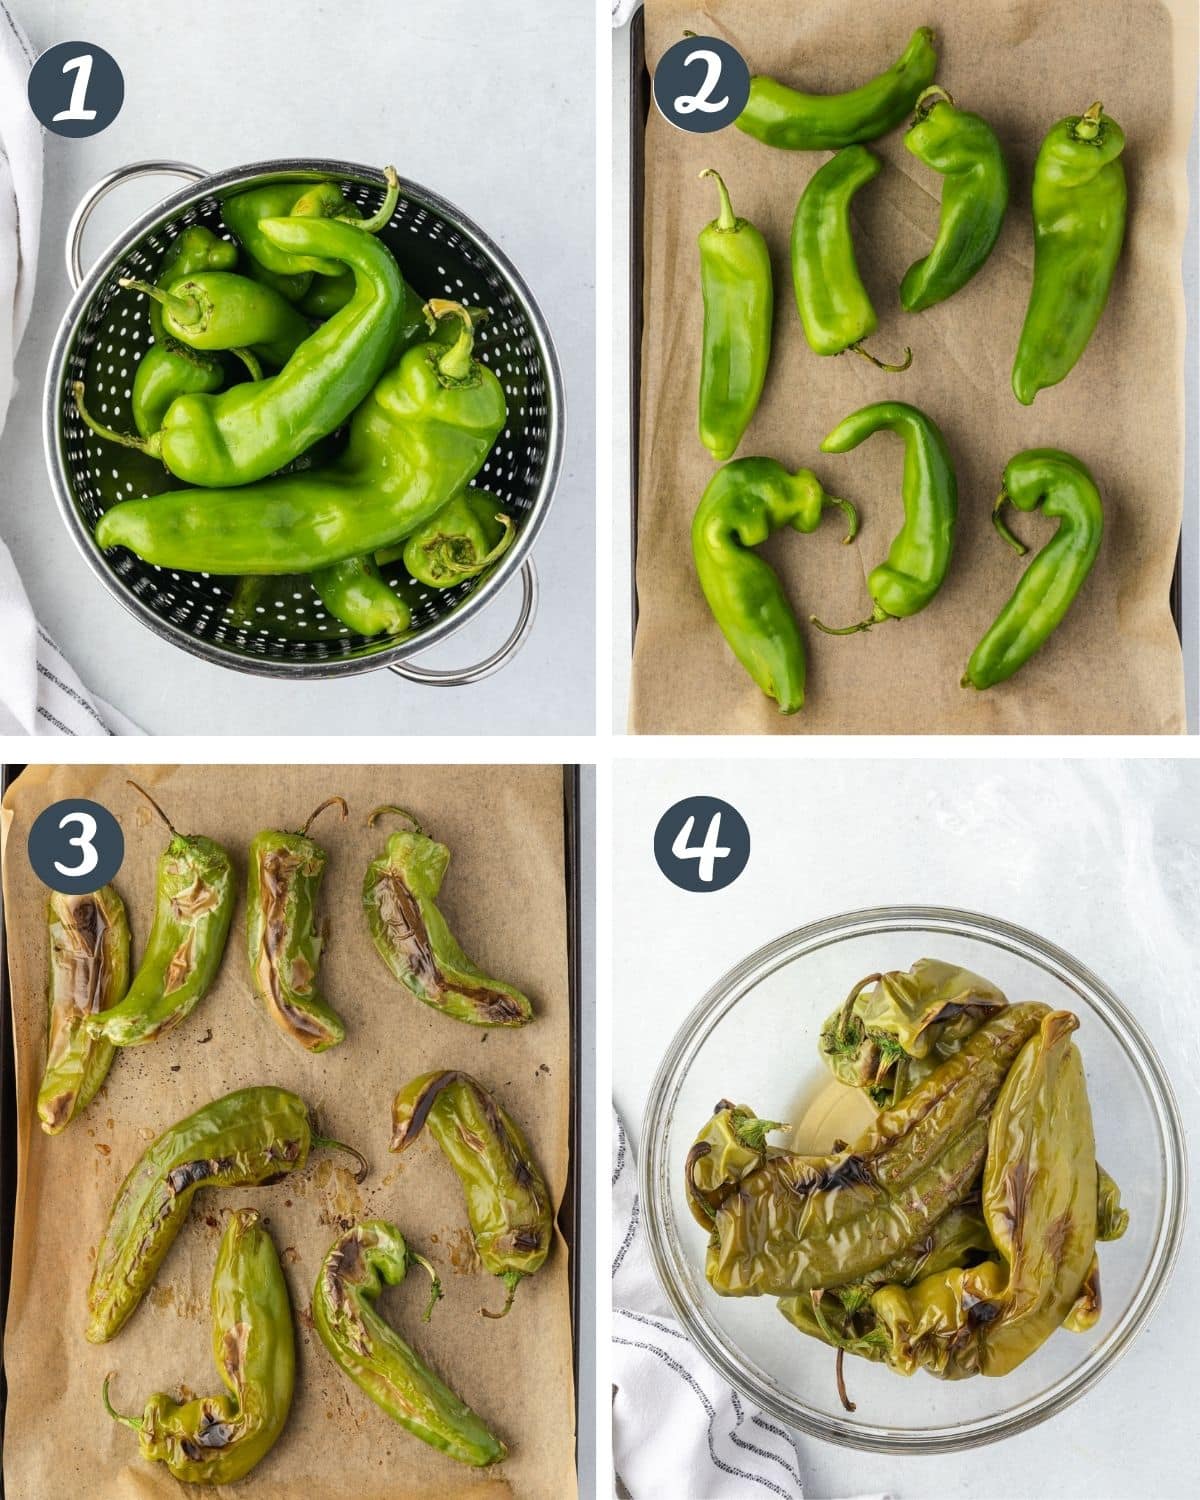
Roasting in the Oven
- Wash your fresh Hatch chiles in a large colander.
- Pat them dry with a paper towel.
- Line a large cookie sheet with parchment paper. (You can also use aluminum foil, but the peppers tend to stick more to foil than to parchment.)
- Spread the peppers in a single layer on the paper. If desired, spritz lightly with olive oil.
- Use the low setting on your broiler (about 450°F / 230°C) to allow the insides to heat up without burning the outside.
- Turn the peppers over after 5 minutes, and continue to cook until the skins are blistered on both sides.
Roasting Chiles on the Grill
- Wash the peppers with cold water in a colander.
- Lay them out on a towel to dry.
- Set your grill to medium (about 450°F/230°C) and place the peppers on the grates directly over the heat source.
- Grill for 4-6 minutes, until the skin starts to blister.
- Turn the peppers over and continue cooking until both sides are charged.
Roasting on the Stove
- Just like with the previous methods, start with clean and dry peppers.
- If you have a gas stove then peppers can be cooked directly over the open flame.
- Simply place a wire rack over the gas flame onto the stovetop.
- Place the peppers on the rack about 1 inch apart.
- Use medium heat and grill for about 5 minutes on each side.
Steam and Peel the Peppers
- Remove your roasted chiles from the oven and use tongs to transfer them to a large bowl.
- Cover with plastic wrap or foil and let them sit for 15 minutes to steam.
- You can put them in a plastic bag instead of a bowl if you prefer.
- Once they have sufficiently steamed the skin will peel right off.
Homemade Diced Green Chiles
Most cans of diced green chiles use Anaheim peppers, as they are available year-round. But Hatch chiles are extra flavorful and can be used in any recipe that calls for diced green chiles.
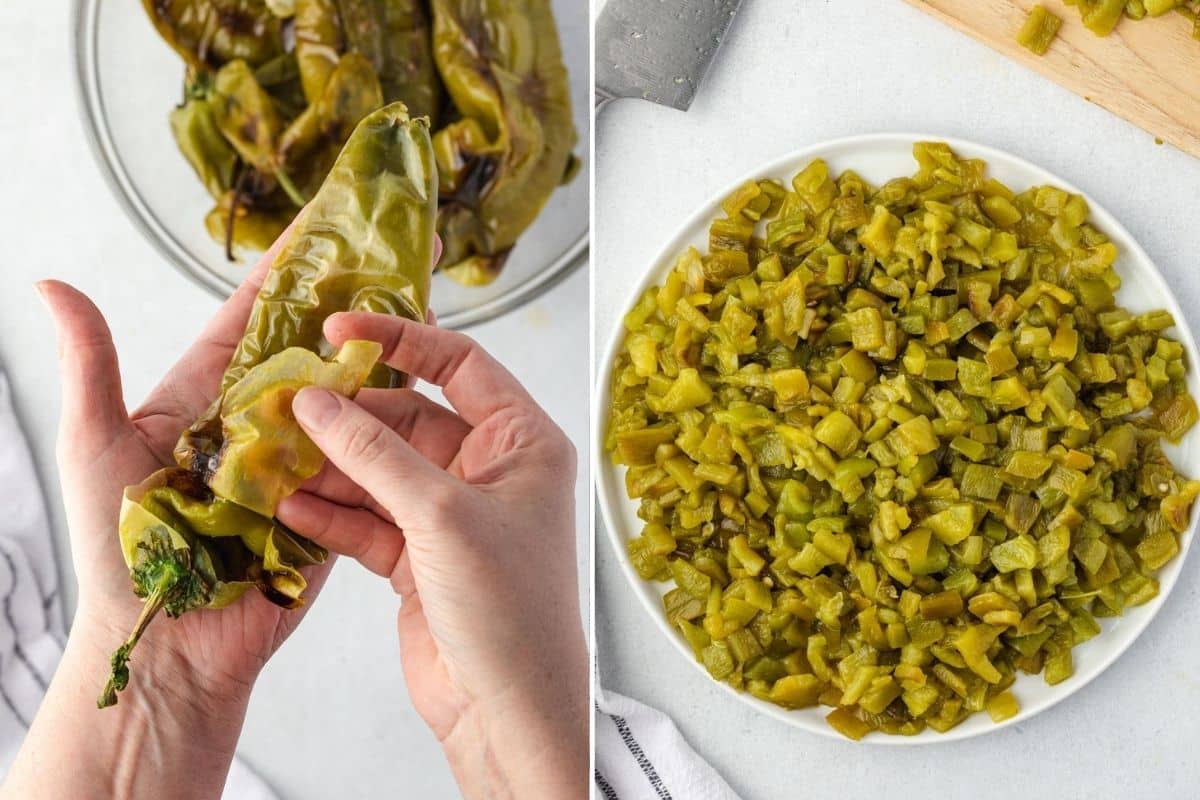
Peel Peppers
- The skin of Hatch peppers is tough and difficult to chew, so it should be removed. Fortunately, the blistered skin is really easy to peel off!
- It can be removed as soon as they are cool enough to handle.
- If you prefer to freeze your peppers whole then you can also easily remove the tough outer skin after it has thawed.
Dice
- Once the skin is removed, lay the peppers on a cutting board.
- Cut into ¼-inch cubes.
- Add a dash of salt to each 4-ounce portion.
Freezing and Storage
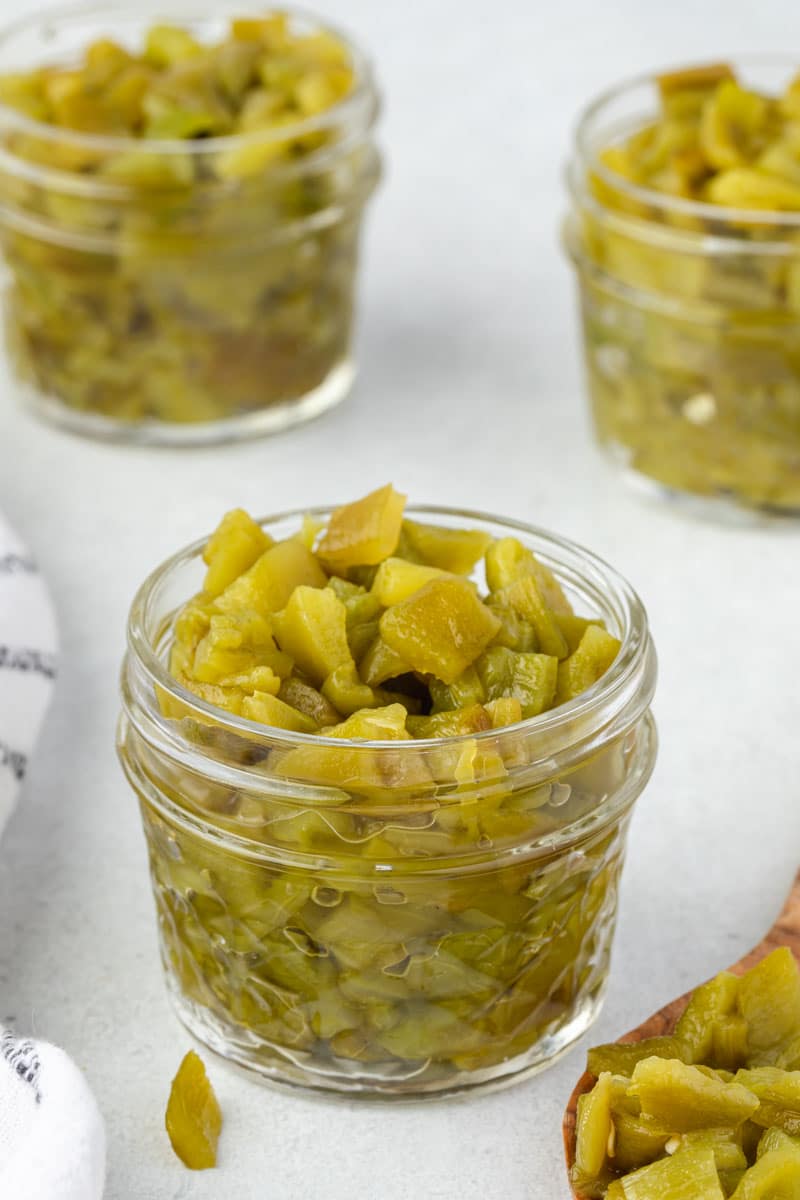
I like to portion the chiles into 4-ounce portions since most recipes call for a 4-ounce can. If you don't have a scale then just measure one-half cup.
Refrigerate your roasted peppers for up to 5 days. For longer storage, you can freeze or can them.
- Vacuum Seal: Vacuum sealing is my favorite way to store roasted chile peppers because it is easy to do, and it keeps air from getting into the peppers, which keeps them fresher longer! When they are vacuum sealed they will stay fresh for over a year in the freezer!
- Freezer Bag: A freezer bag is another easy way to freeze your peppers. Squeeze as much air out of the bag as possible. They will be good for 4-6 months when stored following this method.
- Canning Chiles: To can your chiles you need to use a pressure canner and 8-ounce jars. Fill your clean, hot jars with the diced peppers. Pour boiling water over the peppers, leaving 1-inch of headspace. Process in your pressure canner for 35 minutes at 10 pounds of pressure if you are under 1,000 feet altitude, and at 15 pounds of pressure for over 1,000 feet. Be sure to leave some room at the top for expansion. Canned peppers have a shelf life of 1 year.
Expert Tips
- Store your fresh chiles in the refrigerator and roast them within 5 days of purchase.
- Dry the peppers before roasting.
- Cover the peppers after removing them from the oven, and allow them to steam for 15 minutes. This is the best way to ensure that the skin peels off easily.
Recipe FAQs
Green hatch chiles are smoky with a mild spice. Red Hatch chiles are a more ripe version of the green chile, and they are much sweeter.
Yes, I recommend that you use gloves. Even though the chiles are mild, the oils can still burn your hands.
If you do not have Hatch chiles on hand then you can use Anaheim, Poblano, or Cubanelle peppers.
Green Chile Recipes
Recipe
Oven Roasted Hatch Chiles
Recipe by:Ingredients
- 1 pound hatch chiles
- 1 tablespoon olive oil optional
Instructions
- Rinse the chile peppers thoroughly. Pat dry with a towel.
- Line a large baking sheet with parchment paper or aluminum foil. Lay the dry peppers in a single layer on the paper. Spray lightly with oil, if using.
- Adjust your oven rack to the top ⅓ position, where it is about 6 inches from your broiler. Turn the broiler onto low, or 450°F (230°C).
- Place the baking sheet in the oven and roast the peppers for about 5 minutes, until they are blistering with some char. Turn the peppers over and roast an additional 5 minutes, or until charred.
- Remove the baking sheet from the oven and use tongs to transfer the peppers to a large bowl. Cover with plastic wrap and let sit for 15 minutes to steam the peppers. This helps the peel to loosen from the pepper.
- Carefully remove the peppers from the bowl and peel the outer skin off of each pepper. (It is recommended to use gloves.)
Notes
Equipment
Nutrition
The nutritional facts provided are only estimates. The accuracy of the nutritional information for any recipe on this site is not guaranteed.


Comments
No Comments