
When you want a fancy dessert without a lot of effort, these easy Cheesecake Jars are your answer! It takes just a few minutes to whip up the creamy filling that has a rich, tangy flavor. Then simply layer it with your favorite toppings for a fun, easy-to-serve dessert.

Why You Will Love This Recipe
- No need to turn on the oven: If you are a cheesecake lover then you will enjoy having the option to make this easy dessert during the warm summer months when you don't want to heat up the house by turning on the oven.
- Easy to transport: Similar to no-bake mini cheesecakes, these are individually portioned desserts. But this version is made in cute little jars so they are really easy to take to potlucks, picnics, baby showers, or parties.
- Customizable: You can add a variety of mix-ins or toppings to your no-bake cheesecake recipe to create endless flavor combinations.
- Make ahead: No-bake cheesecakes can be made ahead of time and stored in the fridge until you're ready to serve them, making them the perfect dessert option for busy schedules.
There are many reasons why you might choose a no-bake cheesecake over a baked one. I explore more of those differences here: Baked vs. No Baked Cheesecake
Key Ingredients
The recipe card at the bottom of this post includes the complete list of ingredients, measurements, and instructions.
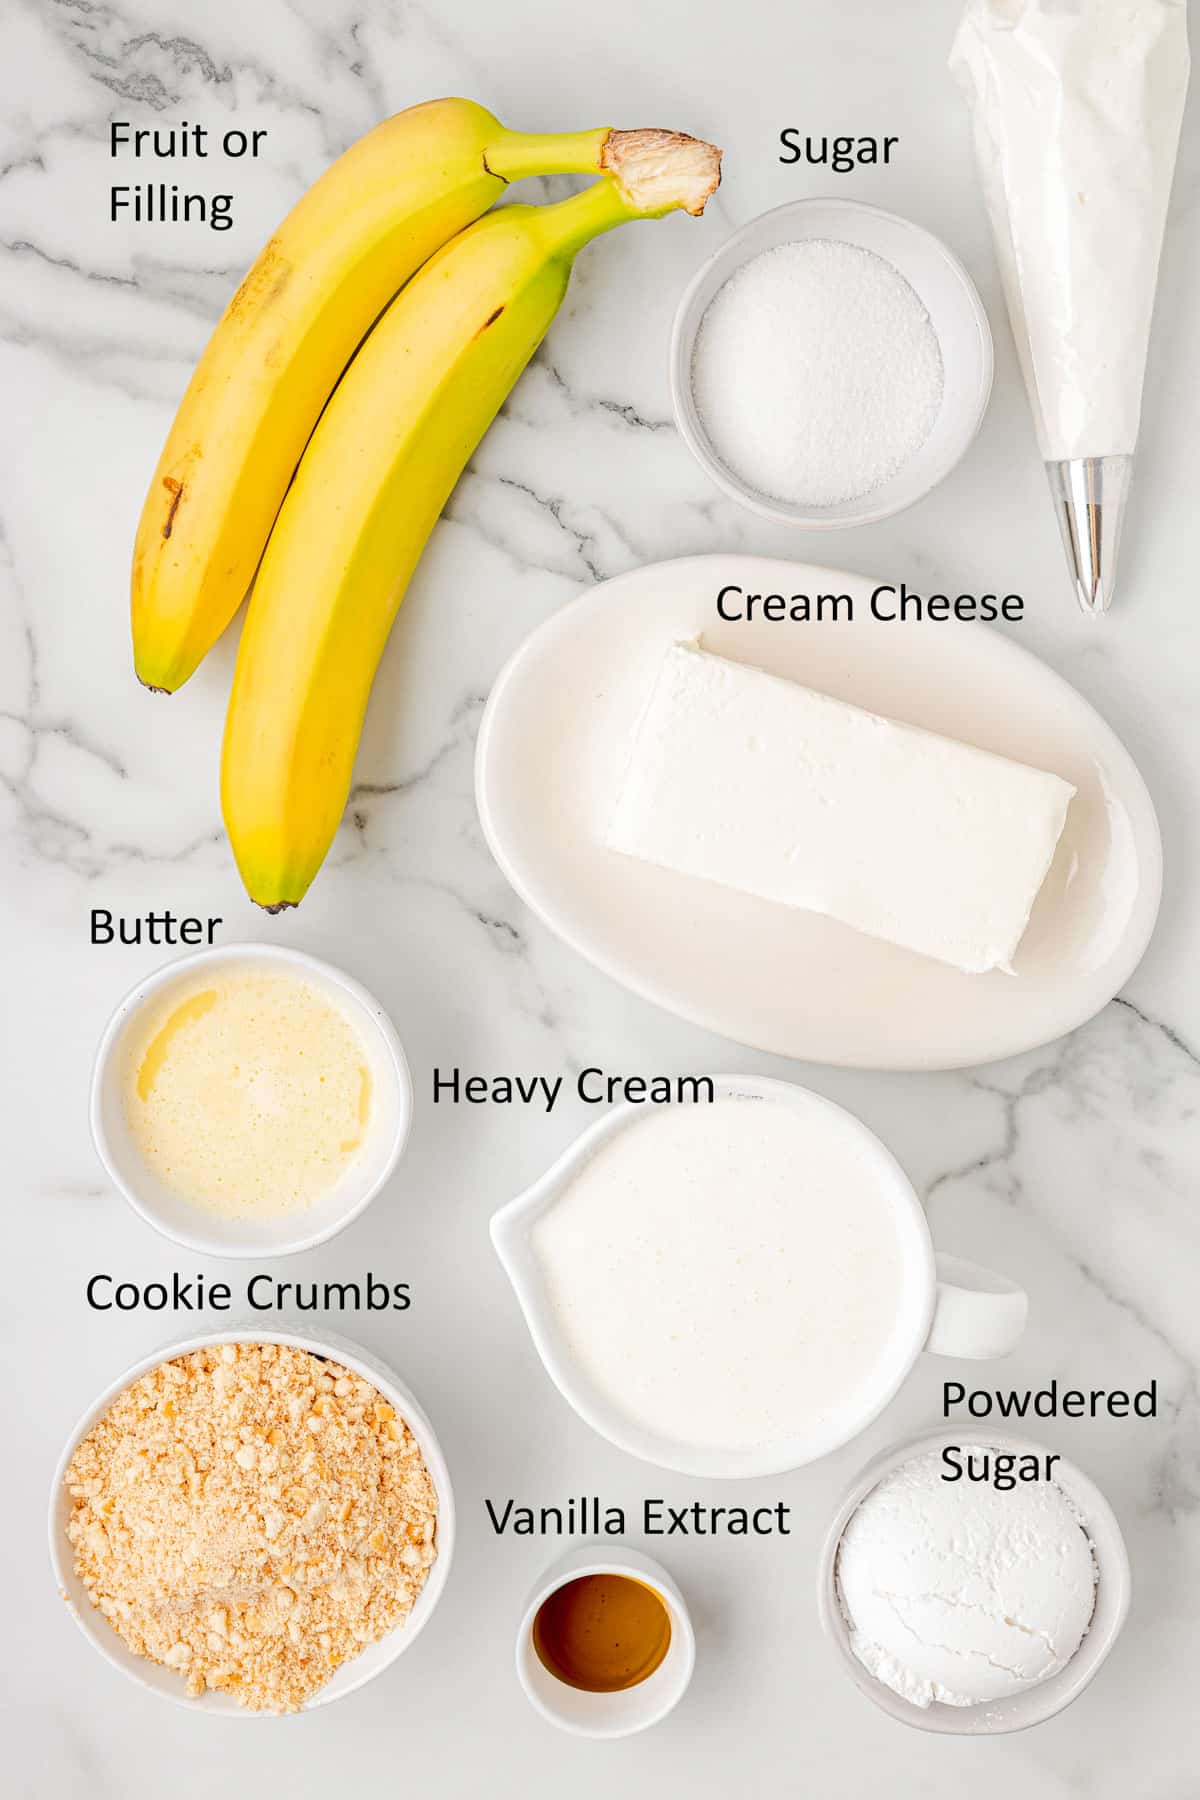
Cookie Crumbs: Use graham cracker crumbs for a traditional cheesecake taste. Vanilla wafers, chocolate sandwich cookies, shortbread, or gingersnaps also work great depending on the flavor you are going for!
Cream cheese: Cream cheese is what gives the cheesecake its creamy texture and tangy flavor. You can use regular or reduced-fat cream cheese for this recipe. If you prefer a lighter filling, you can also use Neufchâtel cheese, which has a similar texture and flavor but is lower in fat.
Powdered Sugar: Powdered sugar is also called confectioners' sugar or icing sugar. Half of it is used in the cream cheese filling and the other half in the whipped cream. You can substitute an equal amount of granulated sugar.
Heavy cream: Heavy cream is used to add richness and structure to the cheesecake filling. Half is reserved for the topping. Substitute 16 ounces of thawed whipped topping (like Cool Whip) if desired, folding half into the filling and using the other half as the topping.
How to Make Cheesecake in a Jar
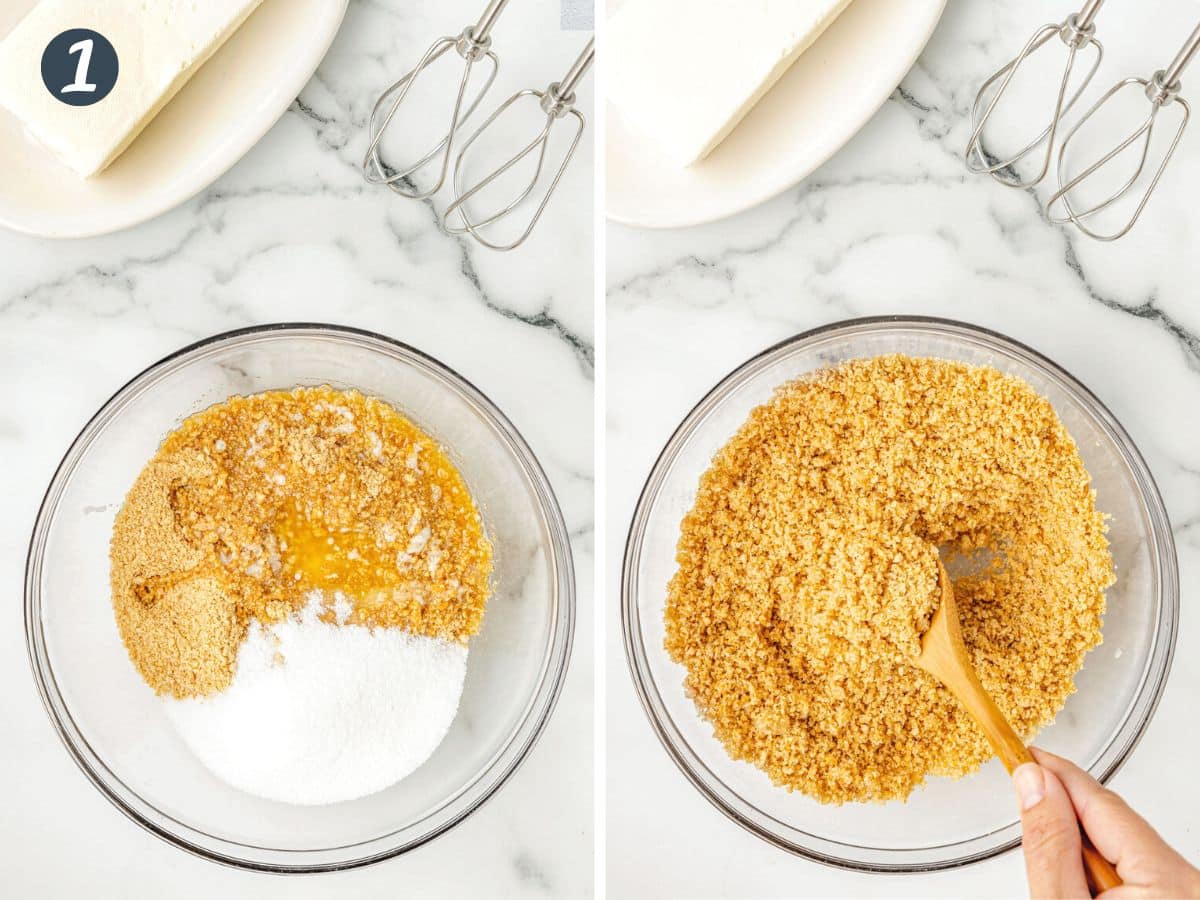
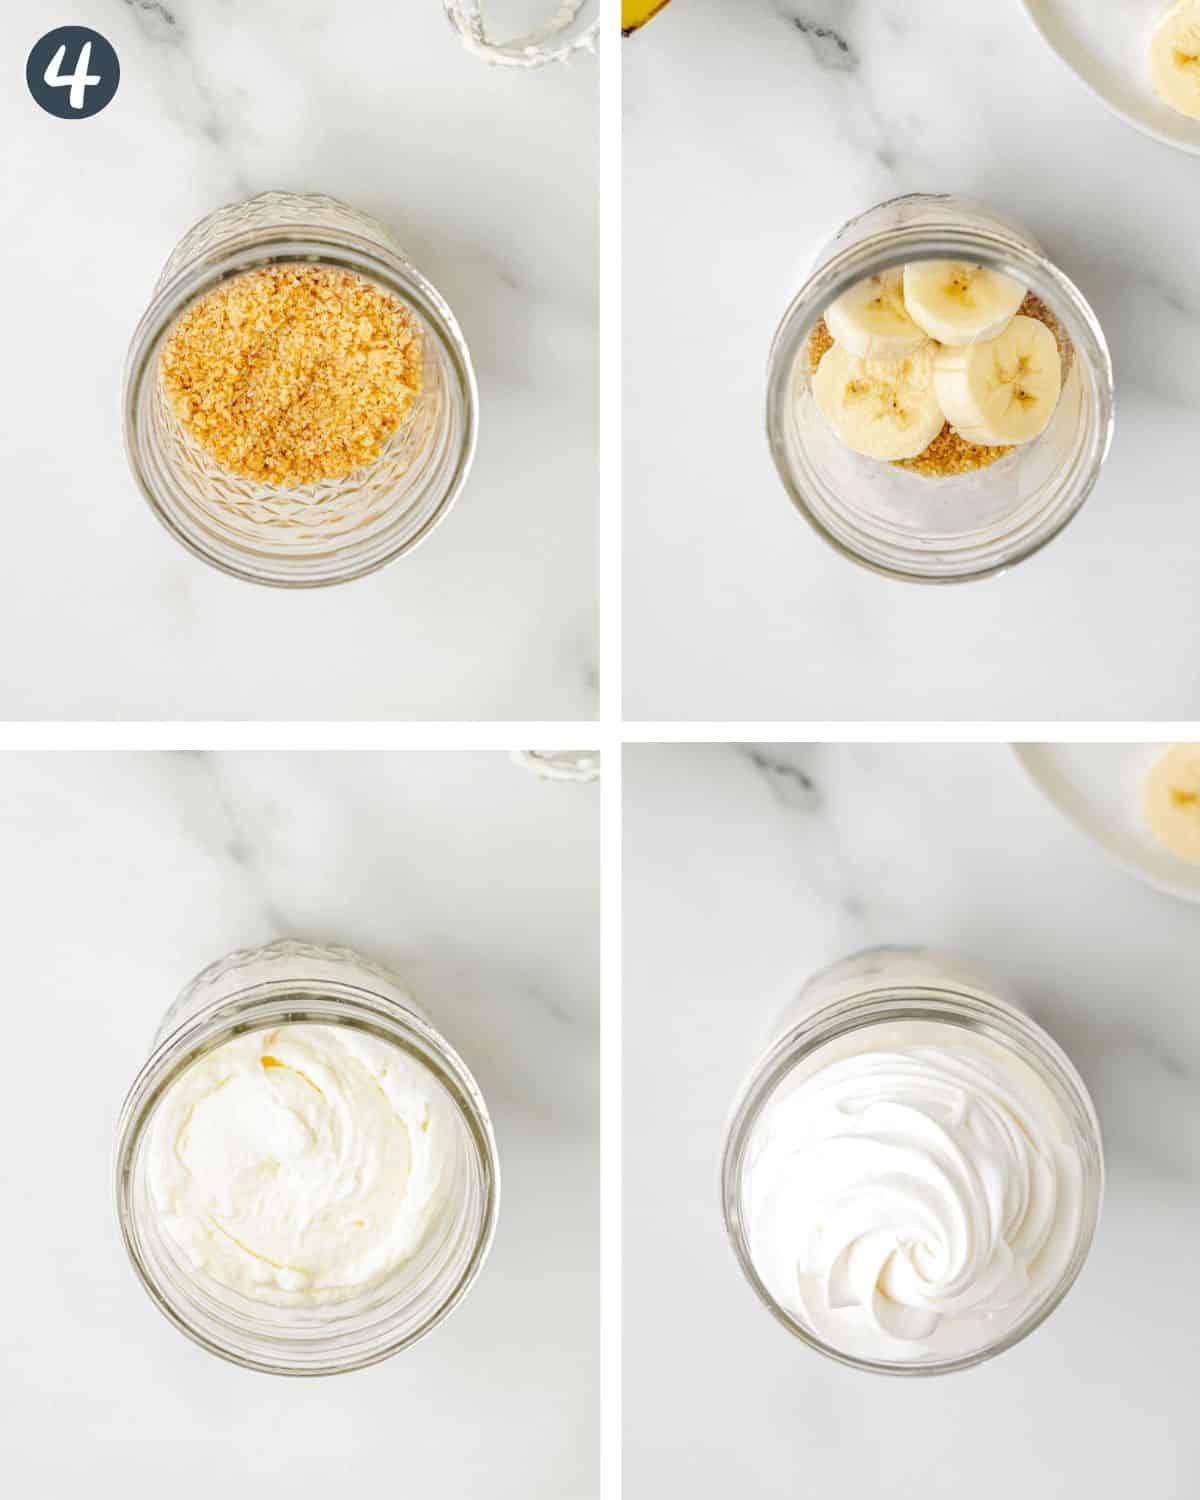
1) Prepare Crumb Layer
- Crush the wafer cookies in a large Ziploc bag using a rolling pin or rubber mallet.
- Transfer the crumbs to a medium bowl and stir in the butter and sugar.
- You can also crush the cookies in a food processor, then pulse the butter and sugar in to mix it.
- The mixture should resemble wet sand.
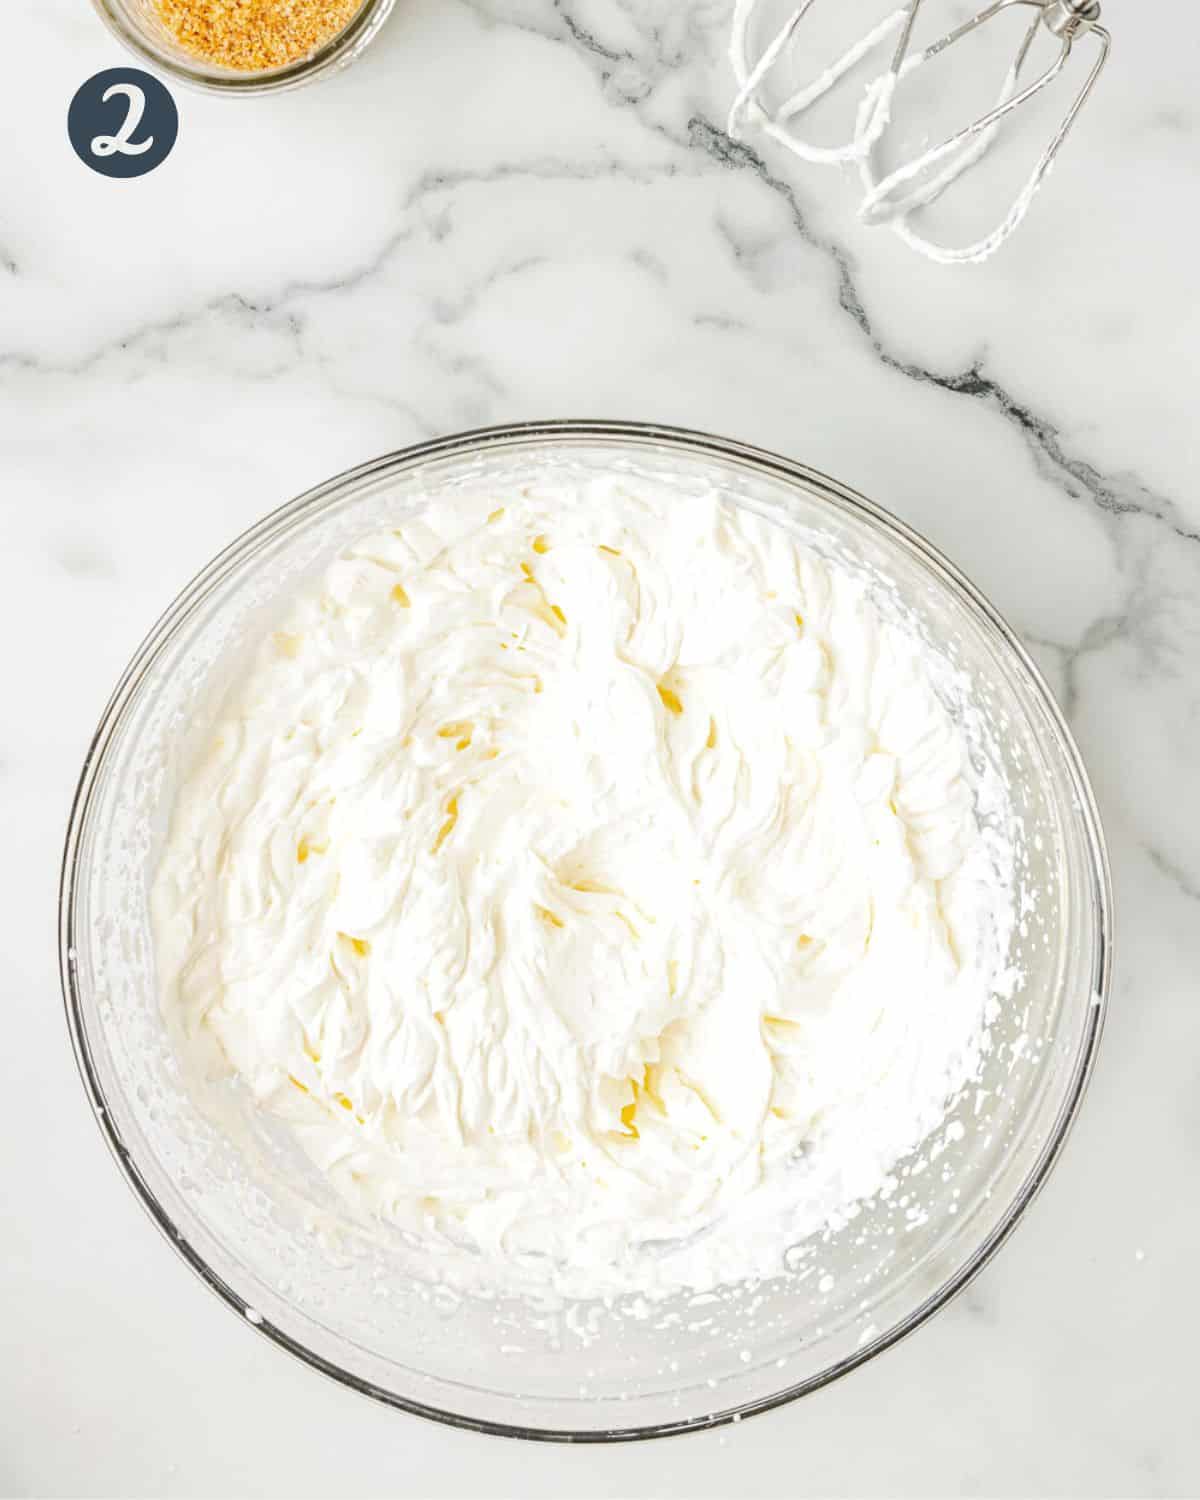
2) Make Whipped Cream
- Beat the whipping cream, ⅓ cup powdered sugar, and vanilla extract in a large mixing bowl until the cream forms stiff peaks.
- If you are making it in advance, add ¼ teaspoon cream of tartar to stabilize the whipped cream.
WANT TO SAVE THIS RECIPE?
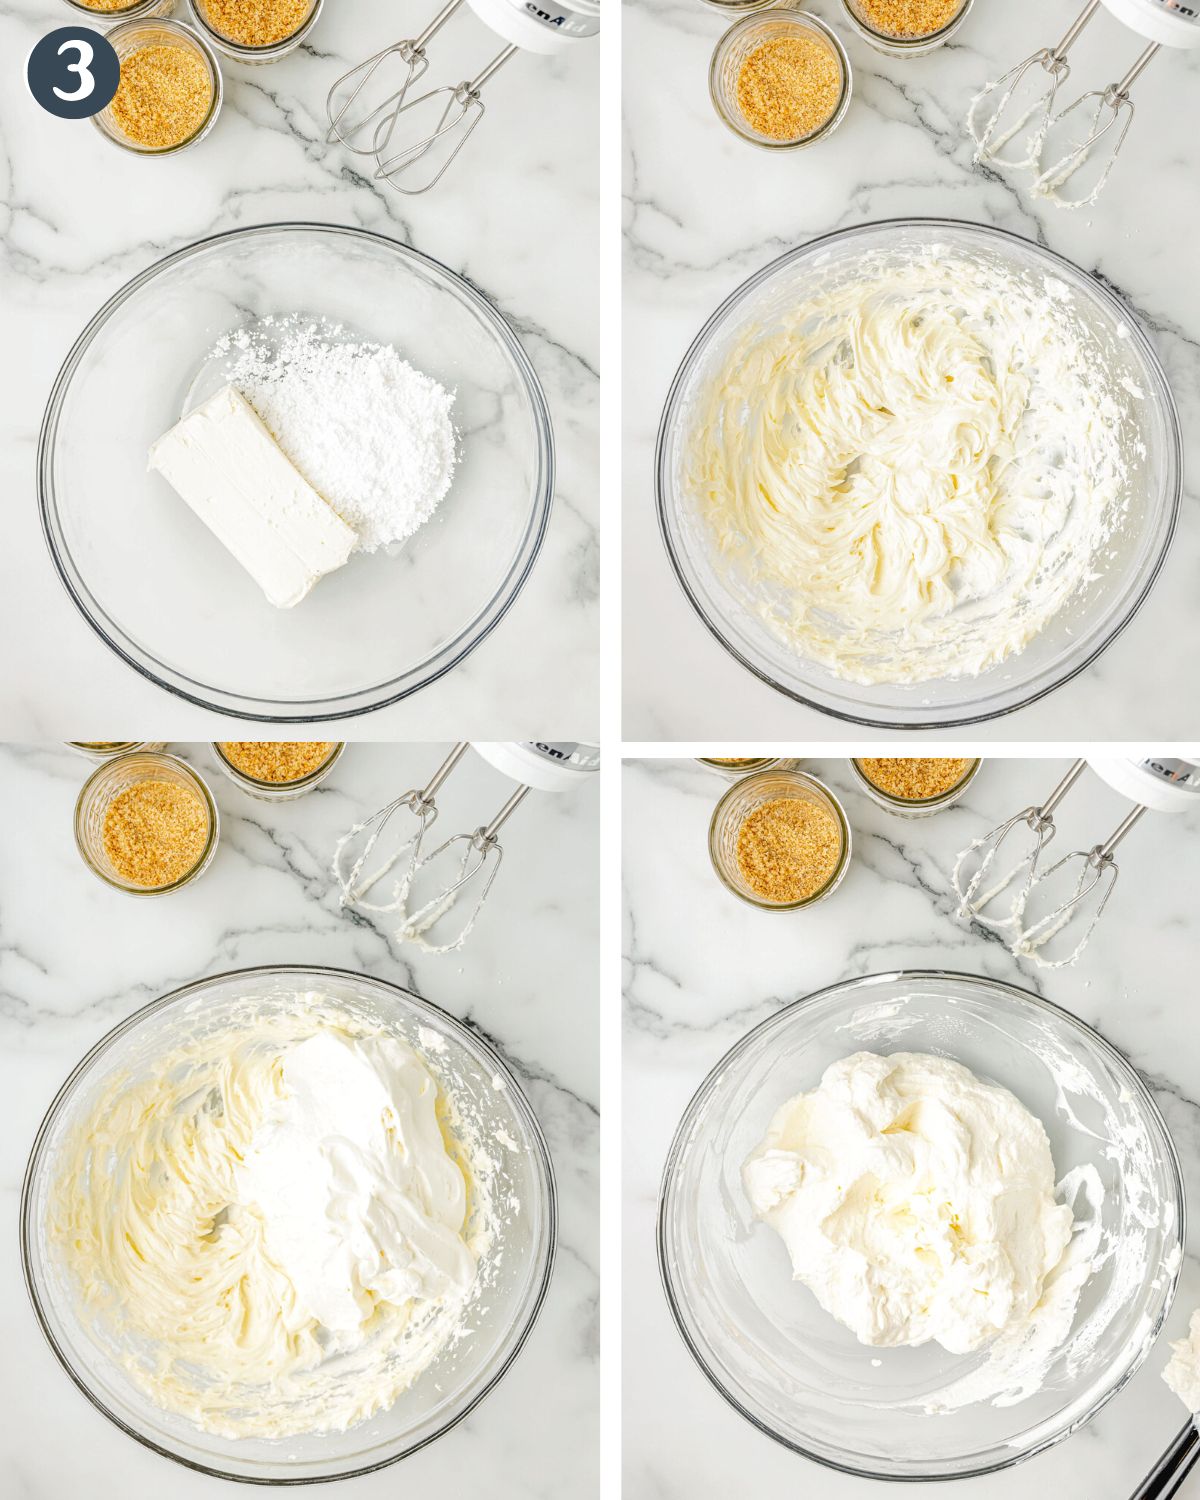
3) Make the Filling
- Place the cream cheese and the remaining powdered sugar into a separate bowl.
- Beat on medium-high speed until it is smooth with no cream cheese chunks visible.
- Add half of the whipped cream to the cream cheese mixture.
- Use a large spatula to gently fold the whipped cream into the cream cheese.
- Place the mixture into a large piping bag.
4) Layer in Jar
- Divide the crumb mixture evenly amongst the jars.
- You'll use about ¼ cup in each jar. Pack it firmly.
- Add a few pieces of fresh fruit, like banana or strawberry slices.
- Pipe the cheesecake filling into each of the jars.
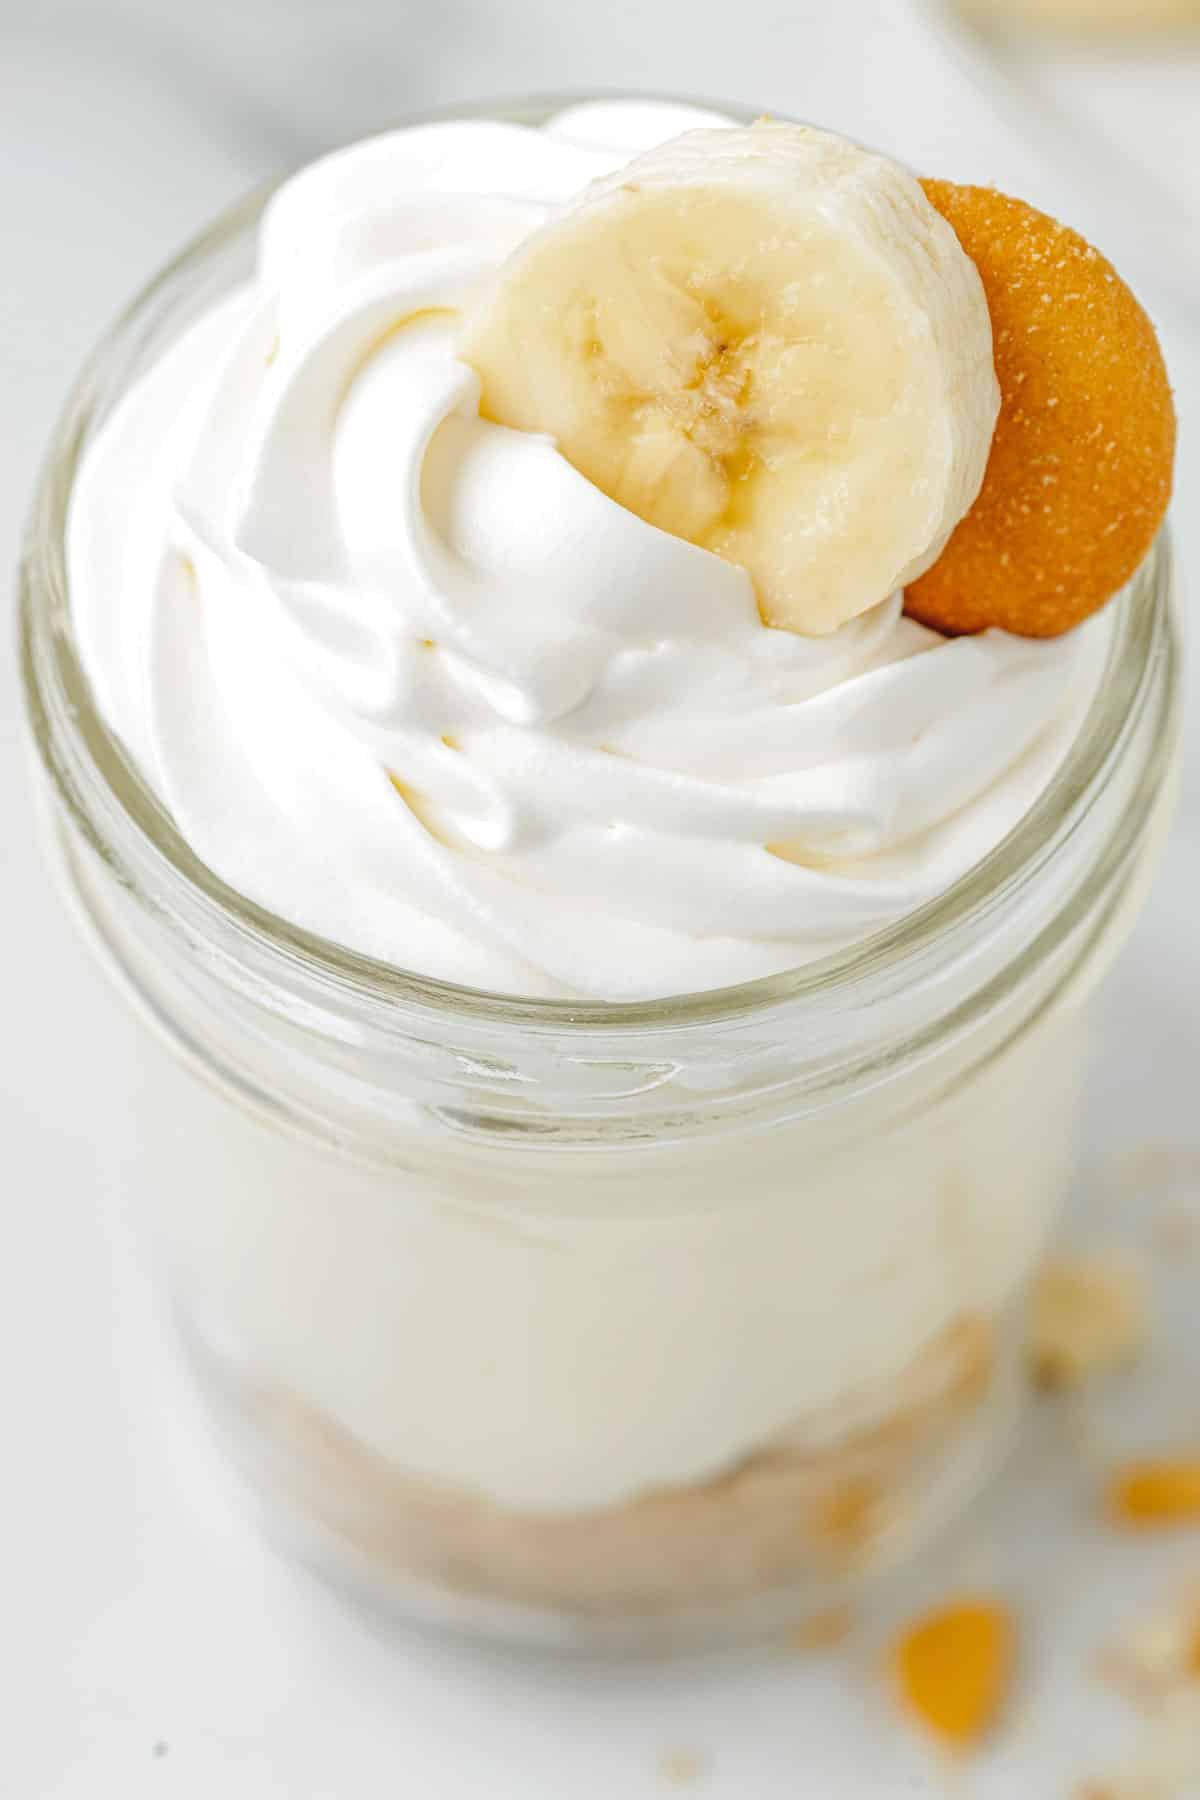
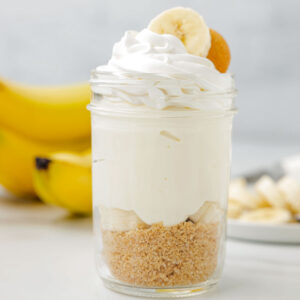
- Top with whipped cream, fruit slices, and a mini cookie.
What Kind of Jar Works Best
These were made in an 8-ounce mason jar, which is a very generous serving. The thing I love about mason jars is that they have straight sides and come with a lid so that it is easy to store.
Smaller jars work well too. It really depends on how big you want the individual servings. If you are serving this on a dessert buffet then I recommend using 4-ounce jars. It would yield 12 servings.
Tips for Success
- Full-fat cream cheese has the best texture. Low-fat cream cheese can be used but it will result in a softer, less stable cheesecake.
- Use room-temperature cream cheese. This will make it easier to mix and will result in a smoother cheesecake.
- If you love the extra tangy flavor of a traditional cheesecake recipe, stir in 2 tablespoons of sour cream into the filling no bake cheesecake filling.
- After you press the crumb mixture into the bottom of the jars, place them in the freezer for 5-10 minutes. This will help them firm up so they don't crumble when you add the cheesecake layer.
- Piping the filling into the jars works better than spooning it in. When you pipe the filling it doesn't make a mess on the sides, and you can distribute the filling more evenly.
- If you are making these jars in advance, add cream of tartar to make stabilized whipped cream so that it doesn't weep.
- Sometimes I like to make whipped cream in a dispenser for the topping. In this case, increase the powdered sugar in the filling to ½ cup and add 1 teaspoon of vanilla extract. Whip 1 cup of whipping cream and fold it into the filling mixture. Then follow the instructions in the whipped cream dispenser recipe for the topping.
Make Ahead ⏳
You can make no-bake mason jar cheesecake in advance. In fact, it's best to make it at least a few hours ahead so that it has time to set in the fridge.
Flavor Variation Ideas
There are so many different flavors you can make! Try one of these fun ideas.
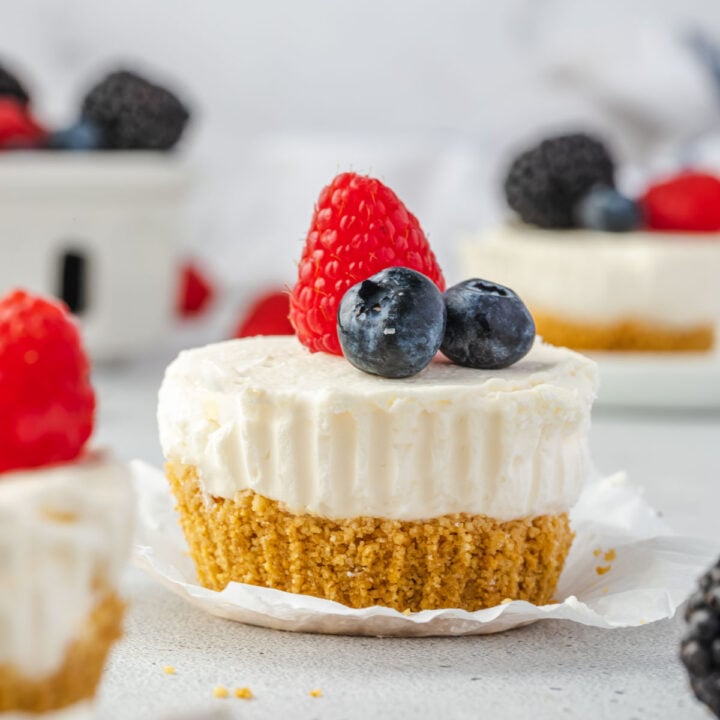
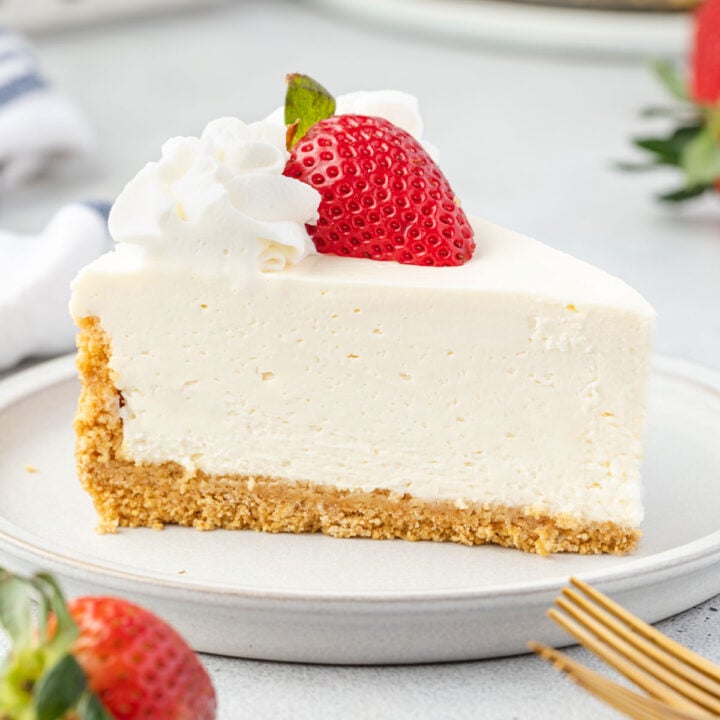
- Fresh Fruit: No-bake cheesecake jars are easily customizable simply by swapping out different fruits. Use fresh blueberries, strawberries, cherries, or bananas!
- Lemon: Stir in 1 tablespoon of lemon juice and 1 teaspoon of lemon zest. Use a graham cracker crumb crust and garnish with a lemon slice and a little extra zest.
- Chocolate: Mix 1 ½ tablespoons of unsweetened cocoa powder into the filling. Use Oreos for a chocolate cookie crumb base.
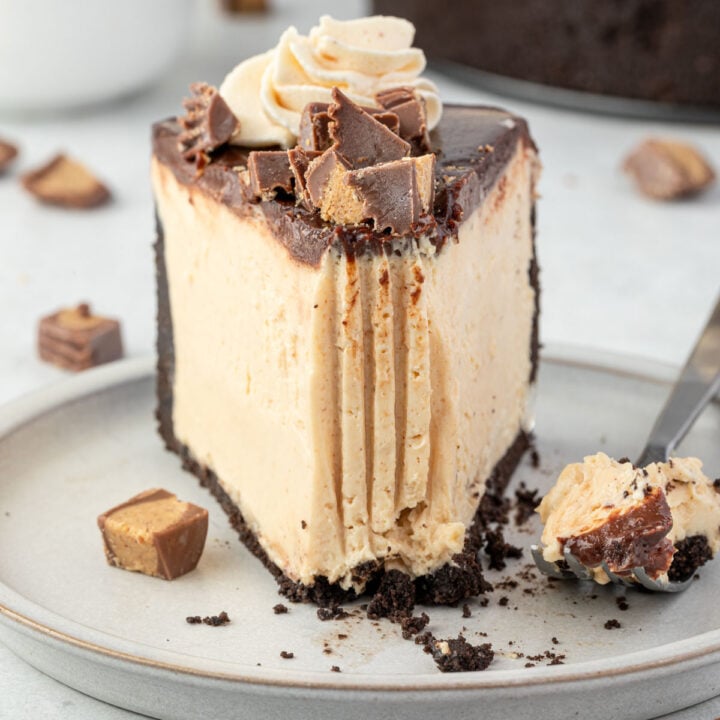
- Peanut Butter Cup: Stir ⅓ cup of peanut butter into the filling. Use an Oreo cookie crumb base and layer with chopped peanut butter cups.
- Banana Split: Layer bananas on top of the cookie crust, then fill the jar halfway with filling. Add a layer of strawberries, then the rest of the filling. Top with chocolate sauce, whipped cream, and a cherry.
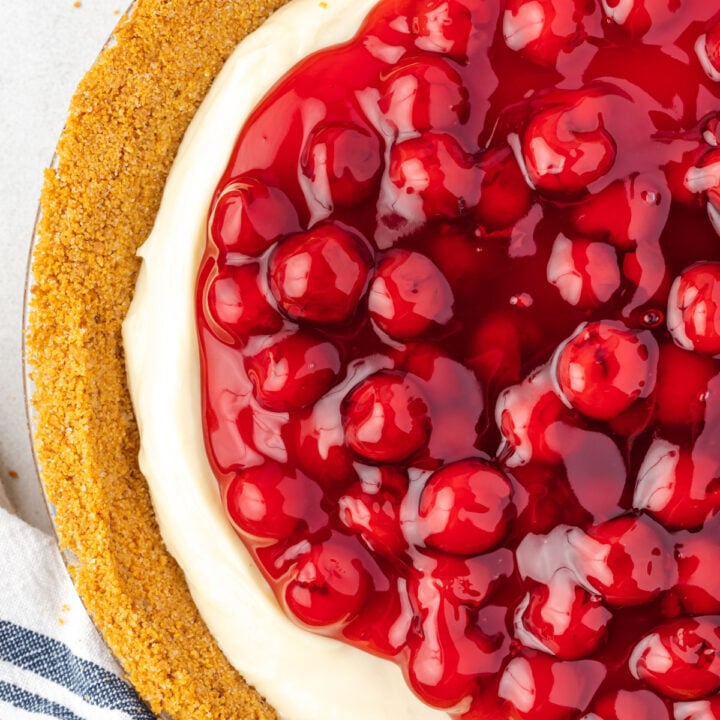
- Pie Filling: Fresh fruit is great, but cherry pie filling or blueberry pie filling is a good idea too! These are best layered between the filling so the cookie crumbs don't get soggy.
If you love the flavors of a banana pudding cheesecake, level it up with this no-bake banana pudding lasagna in a 9x13 pan!
Recipe
No-Bake Cheesecake in a Jar
Recipe by:Ingredients
- 1 ¼ cups cookie crumbs (see recipe notes)
- ¼ cup butter melted
- ¼ cup granulated sugar 50 ml
- 8 ounces cream cheese softened
- ⅔ cup powdered confectioner's sugar divided, 65 grams
- 2 cups heavy cream 250 ml
- 1 ½ teaspoon vanilla extract
- 1 cup sliced fruit or sauce
Instructions
- Place the cookies or graham crackers in a large Ziploc bag and crush them in with a rolling pin until they are fine crumbs. You can also crush the wafers using a food processor.1 ¼ cups cookie crumbs
- Combine crumbs with the butter and granulated sugar in a medium mixing bowl. Set aside.¼ cup butter, ¼ cup granulated sugar
- Beat the cream cheese and ⅓ cup of powdered sugar on medium-high speed using an electric mixer, until it is smooth.8 ounces cream cheese, ⅔ cup powdered confectioner's sugar
- Use a stand or hand mixer to whip the heavy cream, remaining ⅓ cup of powdered sugar, and vanilla extract on high speed in a large mixing bowl until you get stiff peaks. Fold into the cream cheese mixture.1 ½ teaspoon vanilla extract, 2 cups heavy cream, ⅔ cup powdered confectioner's sugar
Assembly
- Portion about ¼ cup of the crumb mixture into the bottom of the six jars. Gently press the mixture into an even layer.
- Place 2-3 tablespoons of filling on top of the crumbs. (If you are using a sauce filling, add some of the cheesecake filling on top of the crumbs. then add the sauce, and top with more cheesecake. That will help prevent a soggy crust.)1 cup sliced fruit
- Put the cream cheese filling into a piping bag and pipe the mixture into the jars. You can also use a spoon to scoop the filling into the jar. Refrigerate until ready to serve.
- Before serving, top the cheesecake filling with additional whipped cream and cookie pieces.
Notes
- For best results, chill the filling for at least 3 hours before serving. It can be made up to 3 days in advance.
- Store the cheesecake jars in the refrigerator for up to 5 days.
- They can also be frozen without the fruit. Wrap the jars tightly with plastic wrap or aluminum foil before placing them in the freezer, and they will keep for up to 3 months. When you're ready to serve, thaw the cheesecake in the fridge for a few hours and top with your desired fruit.
- Fresh fruit is an easy and delicious filling.
- You can also use pie filling.
- See the recipe post for additional flavor variations and filling ideas.
Nutrition
The nutritional facts provided are only estimates. The accuracy of the nutritional information for any recipe on this site is not guaranteed.
Joan Coffman says
This looks delicious and simple to make. Definitely going to try.
Erin says
Thanks, Joan! Let me know what you think!
Dana says
I just love the cheesecake in a jar recipe. So many varieties, and they can be made ahead, so it’s easy to serve at an event.
Big winner ! 🏆
Erin Gierhart says
Thanks, Dana! I love hearing that. They’re such a fun make-ahead dessert